

You can never have too many handbags! Best Dressed with Stampin' Up!
Monday, June 1, 2020 Bridgwater, UK
Anyone who knows me well, knows I LOVE handbags. I also love the colour aubergine, so the handbag on the front row has definitely got my name on it!
The handbags that feature on my card can be found printed on the Best Dressed patterned paper that is retiring from the catalogue in a few days. I cut them out carefully using my paper snips scissors and put them aside while I designed the rest of the card around them.
I chose patterned gingham paper in Purple Posy for the background, to coordinate with the colour of two of the handbags. Then I picked a Smokey Slate card base, with a Whisper White Layer.
I quite often design my cards like this, working backwards from the main feature, making sure everything coordinates!
When I adhered the patterned gingham paper to the Whisper White layer, I didn't add glue to the corners and curled them inwards using my bone folder, hopefully you can see this in these images.
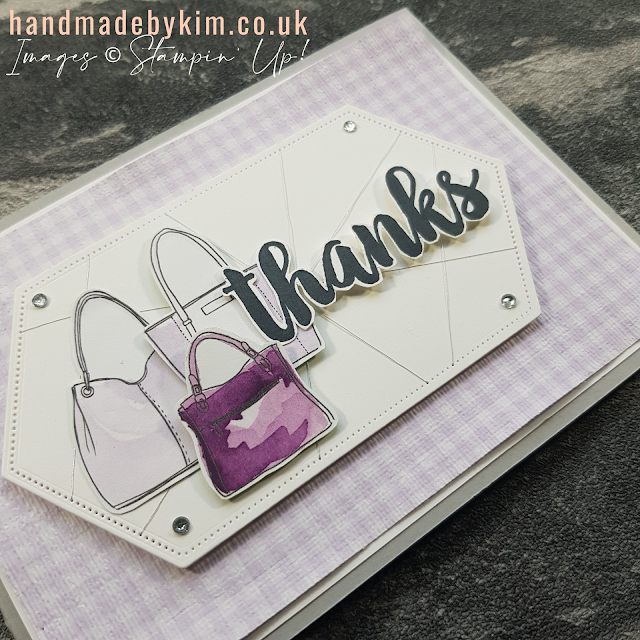
I used the Stitched Nested Labels dies to cut a shape to sit behind the handbags. I picked up my Silver Metallic Thread to wrap around the die cut but then I had an idea! I wondered if the thread would fit through the tiny holes (the die creates to give it a stitched effect)? It did! So just for fun, I created a random pattern using the thread, feeding it through the holes.
This was certainly never my intention, a happy accident maybe! And you know what, I quite liked the finished result!
I added a sentiment to the card, stamping 'thanks' from the Seriously the Best stamp set, using my Stamparatus to get the desired bold result (read more about this in a previous post by clicking here). I cut around the word 'thanks', leaving a thin white border to make it stand out better!
To finish the card, I added some rhinestones. I usually like to add these randomly and in odd numbers however I felt 4 rhinestones placed in these positions looked the best.

With this card, I ticked off two squares on the bingo challenge I've mentioned in my recent posts - 1) embossing and 2) retiring product. If you look closely I embossed the gingham patterned paper with the Subtles embossing folder, twice, in both directions!

Best Dressed Designer Series Paper
 |
| Click on the image for more details |
Seriously the Best Stamp Set
 |
| Click on the image for more details |
Subtles Embossing Folder
 |
| Click on the image for more details |

There are loads techniques you can use when creating handmade cards. This one is a classic example of Simple Stamping! No layers, no die cutting, no masking, no patterned paper!
Ok, so there is a teeny bit of blending using the Pool Party & Mint Macaron colour Stampin' Blends alcohol markers, but it was very simple and quick to do as I kept the colouring really light.
Just like the card I posted on Tuesday, I used the Forever Blossom Stamp Set and the Seriously the Best Stamp Set! I think it's great how there are many different ways you can use a stamp set to create totally different looking cards.

To embellish the card I stuck a few Basic Adhesive Backed Sequins (which are retiring from the catalogue next week) in the colour Soft Sea Foam. Then to add a bit of bling, I added a Rhinestone Basic Jewel in the centre of each sequin. I wish I'd thought of doing this sooner, such a pretty look!

Do you remember me mentioning last Saturday that we were set a creative challenge to complete a bingo card with 16 squares of different techniques? Well, this is the card I entered in the categories; 1) Single Layer and 2) Favourite Colour.
And in case you were wondering..... Pool Party is my favourite colour!

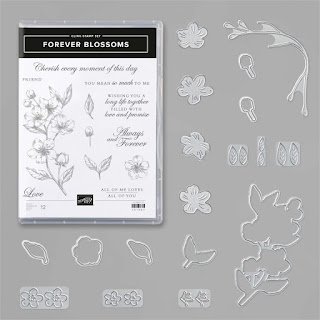
Forever Blossoms Stamp Set & Cherry Blossom Dies
 |
| Click on the image for more details |
Seriously the Best Stamp Set
 |
| Click on the image for more details |

Have you heard of happy mail? Quite simply, it's sending something lovely in the mail to bring happiness to the recipient! It's even better when it's a total surprise.
So that's what I did, I sent out some handmade cards to my fellow crafty friends to say hello and that I am looking forward to seeing them again when it's safe to do so!
I am planning on sending out some more happy mail next month to friends I haven't seen in a while. I'd love to send some out to a few of my blog readers. To enter, leave a comment below and I will randomly pick a few people to send a card to next month!
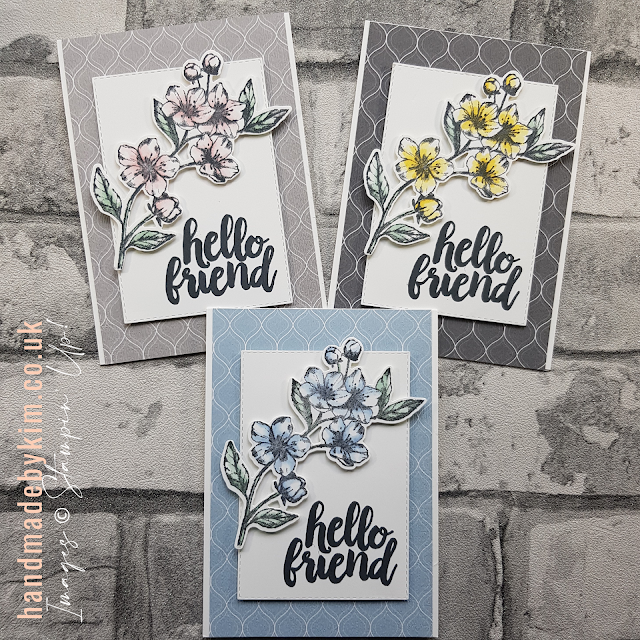
Each happy mail card I created was unique! They all followed the same template with varying colours and backgrounds. These are just a few examples.
I embossed the patterned paper with my fave embossing folder. It's called the Subtles embossing folder and it just gives the paper a linen paper look. I can't seem to stop using it, I love it that much!
I then stamped the flower from the Forever Blossoms stamp set in memento ink and lightly coloured it in using my palest Stampin' Blends alcohol markers, I left random bits of white on the petals and the leaves to achieve the look I wanted before cutting them out with the coordinating Cherry Blossom die.
I die cut a rectangle using the Rectangle Stitched Dies. The stitched effect around the edge is fab, you don't even have to get out the sewing machine!
I used my stamping placement tool - called the Stampin' Up! Stamapartus! - to stamp the sentiment onto the bottom right corner of the rectangle.

I find that when you stamp certain images or thick wording like the 'hello friend' in my card, the stamped image is not crisp and needs further stamping or stamping again. This can be nearly impossible to do freehand as you may not line it up exactly and if you have to stamp it again, you end up wasting lots of precious cardstock, which is totally not cool! Using the Stamapartus tool completely resolves this as you can stamp the image again and again to make sure the outcome is perfect! Helps people like me who have OCD tendencies! It took 3 stamps to get the sentiment to look this bold and I love it! If you want to know more about the Stamparatus, watch this video!
Which of these cards is your favourite? The blue card using the colour Seaside Spray is my personal favourite!

Forever Blossom Bundle
 |
| Click on the image for more details |
Seriously the Best Stamp Set
 |
| Click on the image for more details |
Stamparatus
 |
| Click on the image for more details |
Subscribe to:
Posts (Atom)


Social Icons