
Showing posts with label Typeset Specialty DSP. Show all posts
Showing posts with label Typeset Specialty DSP. Show all posts


I hope you enjoyed the Pinkies Blog Hop a few days ago, wasn't it amazing? We're having a another one later on in June once we've managed to get our hands on some more shiny new products!
I absolutely love love love this DSP. I love a vintage feel and this paper always ticks all of the boxes. I've used loads of it in my projects but I have still never finished a pack. Click here to look at projects made with this DSP.

I used Kraft cardstock and Basic Black cardstock for both designs and changed up the layers so they complimented each other. What do you think?

There is only one project left in my Goodbye DSP series. There is so much other DSP retiring but these have been my ultimate favourites.
You can subscribe to my blog to get notifications of new projects and blog hops (click here to subscribe to receive notifications). I am also building my subscriber list for newsletters I will be sending out in the future with exclusive content and tutorials (click here to subscribe to my newsletter).


After my Typeset Specialty Series that I featured on my blog a few months ago (click here to view) I decided to put my favourite paper to one side. It's been far too long since I've used this amazing paper so here are two cards that I've made.

I've simply layered Typeset Specialty Paper, on top of Kraft Cardstock, on Basic Black base.

I then added a strip of frayed Burlap Ribbon horizontally across the centre of the card using my Fast Fuse adhesive.

Next I made a circle of Gold Metallic Thread and fixed this in place by adding glue dots to the wooden sentiment and placing the thread underneath before adhering the sentiment to the ribbon.
The Burlap Ribbon coupled with the Kraft Cardstock and Expressions Natural Elements gives these cards an Autumnal feel to them....and Autumn is definitely here. I am still defiantly refusing to wear a coat...ask me again in a few days, I'll probably be wearing one.


Today's card is a sympathy card. The choice of stamps in the Crazy About You stamp set allows you to put together combinations of words you don't always have available as one complete sentiment. For example, stamp sets only usually have the sentiment Thinking Of You but with this set I was able to make the sentiment Thinking Of All Of You, which works so much better when sending a card to more than one person.

To make this card, I used the Hardwood stamp set for the wood effect background stamped in Staz On Black Ink onto Kraft cardstock. I also used the Kinda Eclectic stamp set for the leaves, also stamped in Staz On Black Ink. I added a layer of Typeset Specialty Designer Series Paper before mounting it onto Basic Black cardstock. To finish it off, I added a die cut butterfly in black from the Butterflies Thinlits Dies.


Just a quick post from me today. I wanted to show you the name badge I made for the Stampin' Up! Regional Training event I attended on Saturday. I hope you like it!


Today I am attending the Stampin' Up! Regional Training in Telford along with 300 - 400 other Independent Stampin' Up! Demonstrators.
I am really looking forward to it having attended last year and I can't wait to meet up with my fellow crafty friends and also get to play with some of the new products that will be in the new Annual Catalogue.
At events like this we are asked to make swaps. Its not compulsory but its nice to chat with other demos and see what they've made with the Stampin' Up products. You come back with loads of projects which inspire you and can help you to think of alternative ways to use the products outside of your comfort zone.

This year I decided to make little boxes containing tea lights. I have made 65 in total!
I should come home with 65 individual swaps so I really can't wait to see what other demos have made!
I met Sam Hammond Donald aka Pootles a month ago at a crafty weekend in Birmingham and she kindly gave me her amazing tea light box after I said that I was hoping to make a single tea light box for my swap. Please visit Sam's blog and watch her video on how to make the tealight box using the Envelope Punch Board by clicking here - Thanks Sam!!

To make the design for my box I cut the Typeset Specialty Designer Series Paper into 3.4cm by 3.4cm squares. Next I stamped the sentiment Thank You in Versamark ink and used Black Embossing Powder and my heat tool to emboss it. I used my trusty Paper Piercing Tool to hold the paper to my desk when applying the hot air to stop it blowing away!
I then cut Kraft Cardstock into 3.8cm by 3.8cm squares and adhered the Typeset Specialty Designer Series Paper to it using Snail Adhesive.
Can you believe I only needed 1 sheet of Kraft Cardstock and Typeset Specialty Designer Series Paper for all 65 boxes!
I wrapped some linen thread around the tea light box before applying the sentiment to the top using Stampin' Dimensionals to lift it up slightly. I finished it off by tying a bow...although some look better than others as I'm not the greatest at tying bows.
I hope you have enjoyed my project today. I think these would make perfect wedding favours or little thank you gifts. I would love to see what designs you have come up with!
If you are interested in becoming an Independent Stampin' Up! Demonstrator so you can attend next year's event, please let me know!

I hope you enjoyed the projects I've shown you over the last few weeks. Here are a few pictures of the whole series!

Project 1 of 8 - Covered notebook - click on the picture for more information

Project 2 of 8 - Paperclip pot - click on the picture for more information

Project 3 of 8 - Shopping list - click on the picture for more information

Project 4 of 8 -Sticky notes holders - click on the picture for more information

Project 5 of 8 - Tissue holder - click on the picture for more information

Project 6 of 8 - click on the picture for more information

Project 7 of 8 - click on the picture for more information


I hope you enjoyed the projects I've shown you over the last few weeks. Here are a few pictures of the whole series!
Project 1 of 8 - Covered notebook - click on the picture for more information
Project 2 of 8 - Paperclip pot - click on the picture for more information
Project 3 of 8 - Shopping list - click on the picture for more information
Project 4 of 8 -Sticky notes holders - click on the picture for more information
Project 5 of 8 - Tissue holder - click on the picture for more information
Project 6 of 8 - click on the picture for more information
Project 7 of 8 - click on the picture for more information

I've had a great weekend crafting in Birmingham for 2 days with 33 other Stampin' Up! demonstrators. I arrived on Friday evening and went for a yummy Thai meal at Chaophraya with 10 lovely ladies.
On Saturday morning we all arrived at the venue, set up the tables, put our samples on display and got ourselves ready for a full day of crafting.
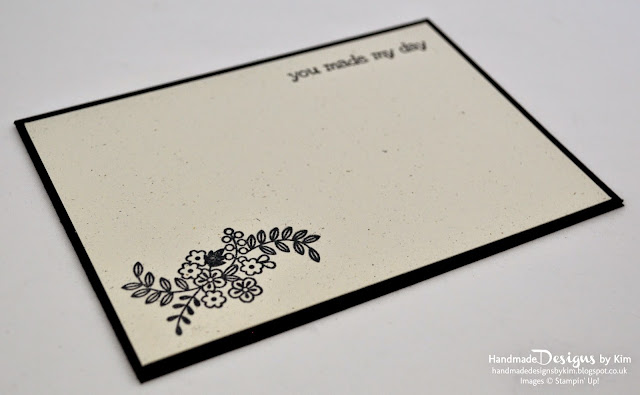
I took these notecards and all of the other projects in this series as samples of my work and I was really touched that so many of my crafty friends had such lovely words to say about the set.
These notes cards fit inside the lid of the stationery tin that featured on Saturdays blog post. They are perfect for many different occasions and there is plenty of space to write a handwritten note.
It was so nice to see what projects everyone else had made so I made sure I took lots of photos. It was so great to get new ideas and look at colour combinations I wouldn't ordinarily use.



Once we had all arrived, we started off the day with a group game, I then attended a Punch Art class and afterwards another class to learn about how to effectively utilise programs and apps to assist us with our hobby or business.
We popped over the road to the Bull Ring to get some lunch and then spent the next part of the afternoon making the craft project that we could work on at leisure over the weekend.
After that we swapped cards and other 3D projects with one another and then ended the day by completing 4 make and takes - each project designed by a different person. Thanks to all the ladies who created the projects and prepped everything for 34 people! and also thank you to everyone for creating some really amazing swaps. Comeback on Friday to see the swaps I made and received.
At the end of a long day of crafting, 22 of us headed over to Jamie's Italian for dinner and we all enjoyed a free taster of Amalfi lemon & Westcombe ricotta gnudi and a shot glass of limoncello. Afterwards we headed back to the hotel to have a good nights sleep before another day of crafting.
On Sunday morning I carried on working on my project and then just before lunch I attended a class on working with the Stampin' Up! specialty papers than you can find on page 192 and 193 of the Annual catalogue. I discovered that I am going to have to work a lot harder on my water colouring technique but what a great excuse to add some Aqua Painters and Watercolour paper to my next order!
I spent the rest of the afternoon chatting and made sure I had completed all of the pieces needed to complete the project, so I could finish assembling it at home.
I can't wait to show you some pictures from the weekend but in the meantime head back to my blog on Wednesday to look at the complete Stationery Set.

On Saturday morning we all arrived at the venue, set up the tables, put our samples on display and got ourselves ready for a full day of crafting.
I took these notecards and all of the other projects in this series as samples of my work and I was really touched that so many of my crafty friends had such lovely words to say about the set.

These notes cards fit inside the lid of the stationery tin that featured on Saturdays blog post. They are perfect for many different occasions and there is plenty of space to write a handwritten note.
It was so nice to see what projects everyone else had made so I made sure I took lots of photos. It was so great to get new ideas and look at colour combinations I wouldn't ordinarily use.


Once we had all arrived, we started off the day with a group game, I then attended a Punch Art class and afterwards another class to learn about how to effectively utilise programs and apps to assist us with our hobby or business.
We popped over the road to the Bull Ring to get some lunch and then spent the next part of the afternoon making the craft project that we could work on at leisure over the weekend.
After that we swapped cards and other 3D projects with one another and then ended the day by completing 4 make and takes - each project designed by a different person. Thanks to all the ladies who created the projects and prepped everything for 34 people! and also thank you to everyone for creating some really amazing swaps. Comeback on Friday to see the swaps I made and received.
At the end of a long day of crafting, 22 of us headed over to Jamie's Italian for dinner and we all enjoyed a free taster of Amalfi lemon & Westcombe ricotta gnudi and a shot glass of limoncello. Afterwards we headed back to the hotel to have a good nights sleep before another day of crafting.
On Sunday morning I carried on working on my project and then just before lunch I attended a class on working with the Stampin' Up! specialty papers than you can find on page 192 and 193 of the Annual catalogue. I discovered that I am going to have to work a lot harder on my water colouring technique but what a great excuse to add some Aqua Painters and Watercolour paper to my next order!
I spent the rest of the afternoon chatting and made sure I had completed all of the pieces needed to complete the project, so I could finish assembling it at home.
I can't wait to show you some pictures from the weekend but in the meantime head back to my blog on Wednesday to look at the complete Stationery Set.
Here is a sneak peek of the complete collection of 8 projects!

We are almost at the end of this series with project number 7 which is a covered stationery tin.
Inside the tin I've made a pocket to hold 4 coordinating notecards and envelopes.

The tin can also hold a number of other stationery items, in this photo you can see that I have put it the covered notebook, shopping list and sticky notes that have already been featured but of course you could put whatever you like in it!
I love the effect of stamping onto the Typeset Specialty Designer Series Paper and the Swallowtail Butterfly stamp looks just lovely.


Inside the tin I've made a pocket to hold 4 coordinating notecards and envelopes.

The tin can also hold a number of other stationery items, in this photo you can see that I have put it the covered notebook, shopping list and sticky notes that have already been featured but of course you could put whatever you like in it!

I love the effect of stamping onto the Typeset Specialty Designer Series Paper and the Swallowtail Butterfly stamp looks just lovely.

My next project is the 4 notecards that fit inside the pocket of this stationery tin. Make sure you come back on Monday to see these!
Here is a sneak peek of the complete collection of 8 projects!
Subscribe to:
Posts (Atom)


Social Icons