
Showing posts with label Word Window Punch. Show all posts
Showing posts with label Word Window Punch. Show all posts


Happy Mothers day! I hope you are having a lovely day either being spoilt or just putting your feet up. I am sat on the sofa watching a film while my husband is at work. Both my little cats are with me - bliss!
My Mum has just called to say she just received her flowers, I hope she likes them and the card I sent her!
Last weekend I ran my very first workshop and it was such fun! The theme was mothers day and we had 6 hours to make a matching collection of gifts - a card in a box, a bag in a box (which included the small tin that fit perfectly inside) and large tin.
I gave the four ladies Abi, Aimee, Kelly & Laura a choice of 2 designer series papers - Timeless Elegance or Birthday Bouquet. Abi and Aimee chose Birthday Bouquet and Kelly & Laura chose Timeless Elegance.
I like to give a choice as we all have different preferences. My personal favourite is Timeless Elegance but the Birthday Bouquet paper has really given me a chance to work with such pretty colours over the last few months, I shall be sad to see this one go (if you really like it but haven't ordered it yet, you've only got just over 2 months to order it!)

I ended up changing the design of the Birthday Bouquet card in a box at the last minute, instead of a Blushing Bride layer, I changed it to Pool Party and instead of the pink striped pattern of DSP on the bottom level, I changed it to the flowers, I feel this works so much better now.

I gave all four ladies packs containing all of the DSP and cardstock needed and also gave some options for them to change the colours of the flowers etc so they could make it their own. My version below uses Very Vanilla and Basic Black for the flowers, but Laura chose to use Sahara Sand instead of Very Vanilla and I think it worked just as well.

The bag in a box was fun to make. I prepped all of the cardstock so all we had to do was assemble it. It really is so easy, if you haven't made one yet, you must give it a go (click here to watch my friend Caroline Hallet's YouTube video on how to make it)

At the time I made my samples, I had run out of the lovely flowers so I had to use the ice cream cones paper, we didn't use this one on the day but the paper is so cute!
The little tin fits perfectly in the bag in a box and is perfectly for holding a piece of jewellery or gift card.

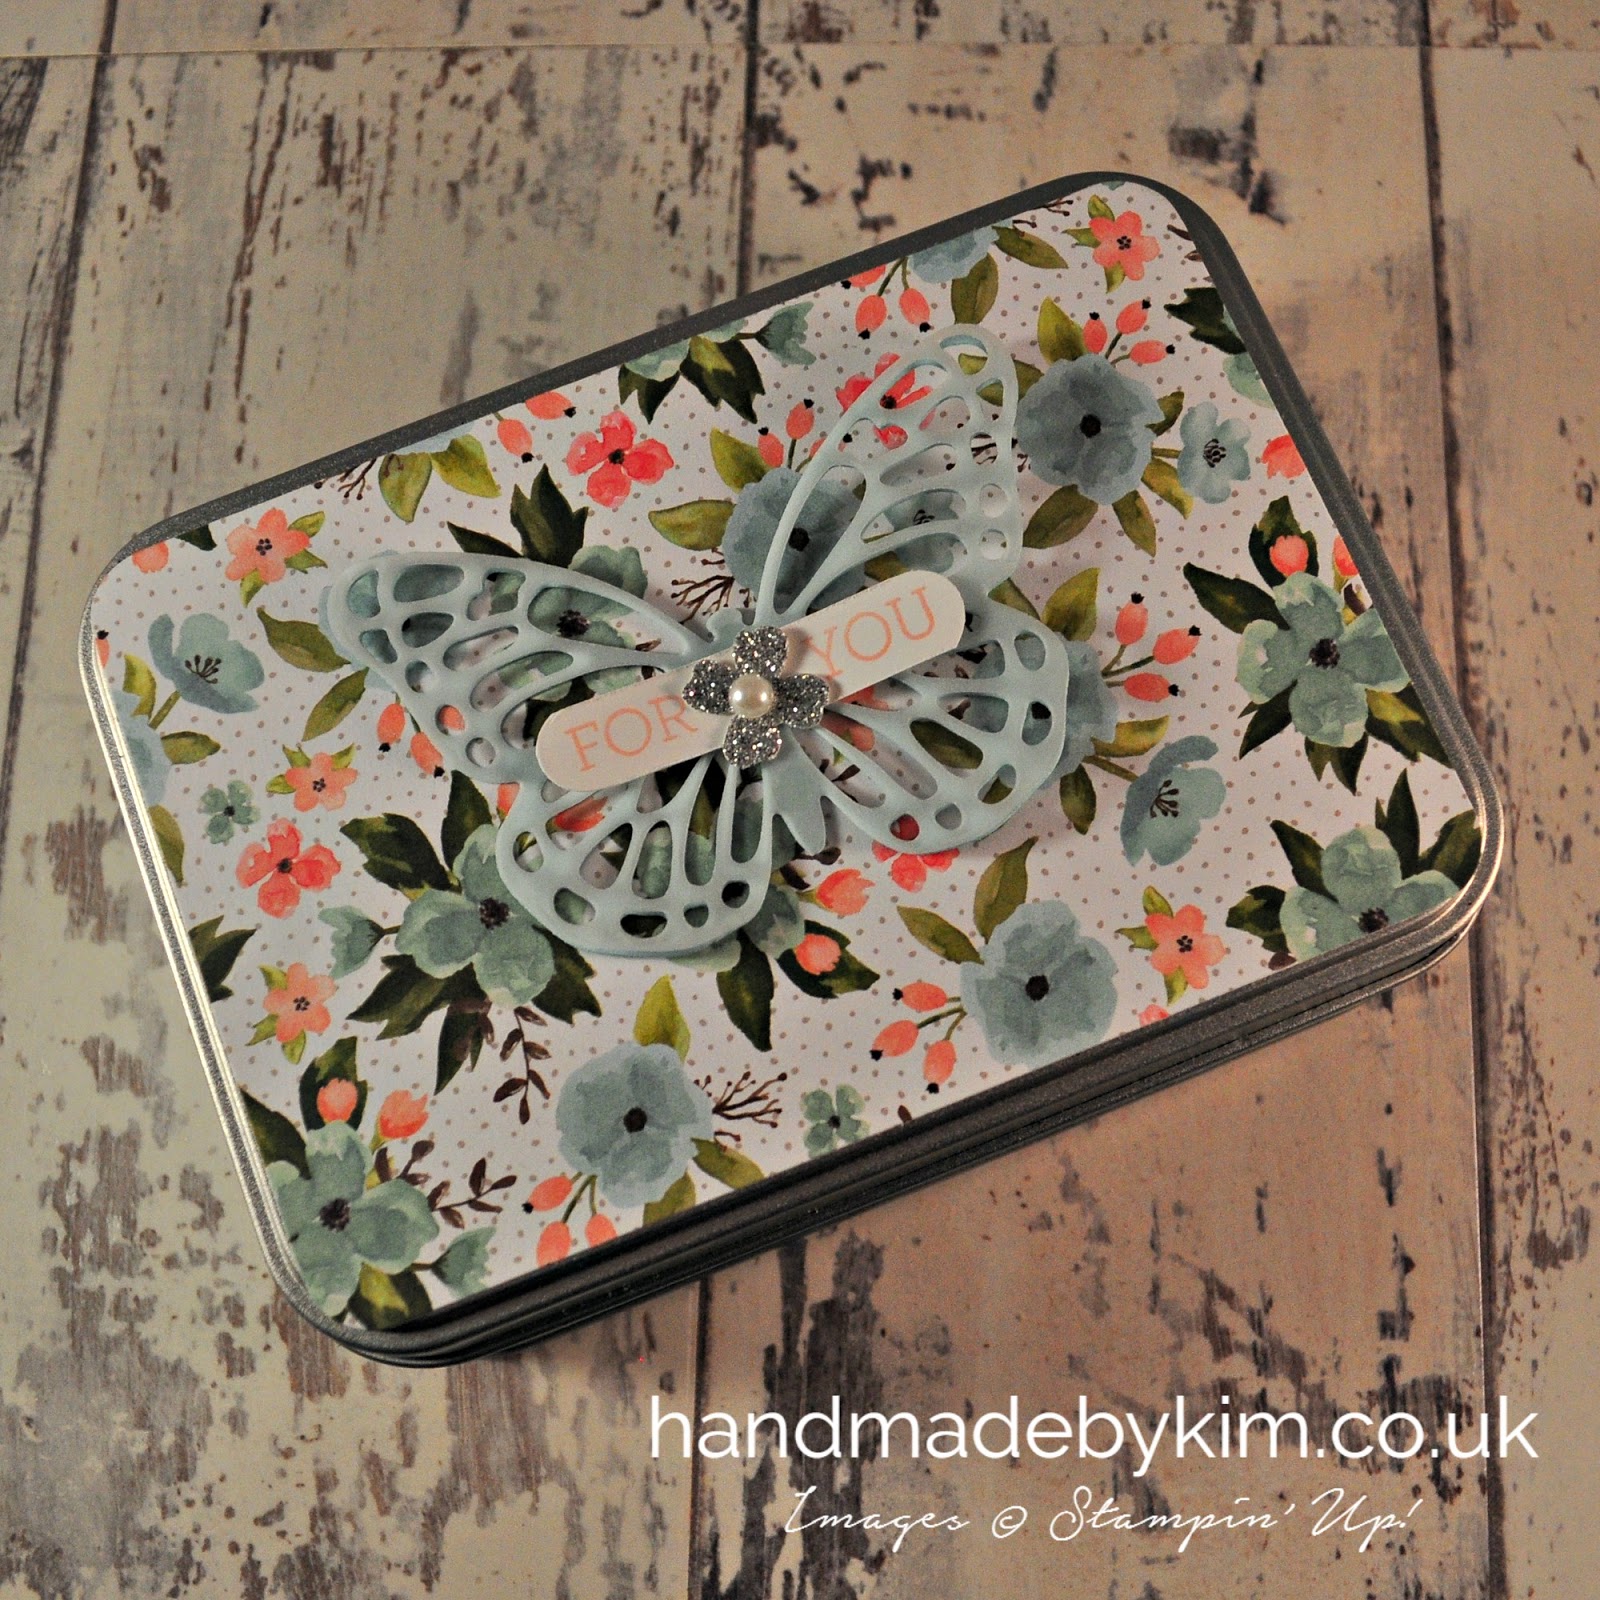
We also had time to make the large tin. This could be used for so many things. My friend Aimee discovered that it holds two hotel chocolate slabs perfectly - amazing! What is better than receiving a handmade designed tin of chocolates?

The tin is also the perfect size to include some small handmade cards, there are so many options on what you can do with it!
It was so much fun preparing for the workshop and setting up the room. I wanted it to be perfect and set up a table each so we had enough space plus a big shot station.

Each person had a thank you gift bag and card, a sheet of grid paper, a pack of supplies, the metal tins and a brown bag to take everything home in.
I had enough equipment for each pair to share a trimmer and scoreboard, plus I put together a toolkit together for each pair to share.
Aimee brought along her die cutting machine so we could double the amount of flowers cut with this and also using the big shot.

Here is everyone cutting their flowers using the Big Shot. I showed them the plastic bag technique (click here to watch my friend Smiley's youtube video on this) and also using the new Big Shot Die Brush, both techniques are amazing and absolutley essential when cutting large amounts of flowers or intricate dies.

Everyone did an amazing job with the projects - especially as it was Abi's, Kelly's and Laura's first time crafting.
This is what Abi made. I love how she has added a glitter butterfly to the card in a box and how she changed up the butterflies on both tins and the bag in a box. The pearls are simply stunning too and look great in the brads on the bag in a box.

Here is what Laura made. I really like how Laura used Sahara Sand instead of Very Vanilla. I also love her two layer butterflies she made with the Elegant Butterfly punch. The bottom later was cardstock ad the top layer was glimmer paper and some others were the opposite. I will be using this idea myself for sure!

Aimee has recently joined my team and is already in love with the products. I love how she has curled her butterflies on the large tin in the opposite direction to what I did and how she used the reverse side of the DSP on the bottom layer of the card in a box and also for the tins.

Kelly did a great job too, I am just sorry I didn't get a better picture. I love how she has placed two butterflies together on the small tin, its something I never would have thought of doing and it looks so great.

I hope you've enjoyed me sharing my first workshop with you today. I had such a great time and it was a pleasure seeing how well Abi, Aimee, Kelly and Laura did in completing these complex projects and making it their own.
Come back on Friday to see the thank you cards, thank you gift bags and tool kits in more detail!
Remember, if you would like to receive the tutorial on how to make the card in a box, please sign up to my newsletter. You can sign up in the side bar on the right hand side under "subscribe for exclusive content". If you receive my blog updates by email you will still need to sign up as I can't automatically add you without your permission.

Timeless Elegance version
Built for Free Using: My Stampin Blog
Birthday Bouquet version
Built for Free Using: My Stampin Blog


I made these baby cards as I just wanted an excuse to play with the ever so cute Zoo Babies stamp set.
All 3 are based on the same design, a Very Vanilla cardstock base, a layer of Subtles Designer Series Paper (I've used the colours Blushing Bride, Pool Party and So Saffron) a circle die cut from Sahara Sand cardstock and another circle die cut from Very Vanilla cardstock with one of the Zoo Babies animals stamped in Sahara Sand Ink.

I've sponged the edges of the polka dot DSP with Sahara Sand ink and added some Sahara Sand Lace Trim to give it a subtle vintage look.
All 3 cards have different messages - Hello Baby, Welcome Baby and Congratulations. The Hello Baby sentiment is from the Teeny Tiny Sentiments stamp set, the Welcome Baby sentiment is from the And Many More stamp set and the Congratulations sentiment is from the Zoo Babies stamp set. I punched out the sentiments using the Word Window Punch.
They are so cute! I can't wait to give these to new parents. Its so much nicer to receive a handmade card instead of a shop bought card, don't you think?

OMG! I'm so excited, I've just seen sight of the new Spring Summer catalogue AND the Sale-a-Bration catalogue. And let me tell you, I've seen some really great new products - stamp sets, designer series papers, ribbons, punches, tools, embellishments....... I cannot wait to get my pre order in and I am so hoping the mental wishlist I've made comes in under my budget.
But for now, don't forget the Autumn Winter catalogue is still live. Make sure you place an order for anything you've put on your wish list and haven't ordered yet. Now that this catalogue is coming to an end, products will be running out of stock - just yesterday I placed an order for some new Christmas stamp set sets to make some of my personal Christmas cards - I am so pleased I got the order in and the items were in stock as I am sure they will be sold out very soon. Some items will be carried over to the new Spring Summer catalogue, I have seen the retiring list so please do let me know if there is any item you want me to check if its retiring or not.
Remember, if you have any questions at all, just drop me a line by clicking on the social media icons on the right hand side or emailing. Happy crafting and I hope to hear from you soon.


Happy Haunting Halloween Party Invitations using Stampin' Up! Products
Wednesday, September 30, 2015

The dark nights are settling in now and soon the winter coats & scarfs will be coming out. I love our seasons and whilst I am sad that summer is well and truly over, I am looking forward to Halloween, Bonfire Night and Christmas!

With Halloween just over a month away, I decided to make some Halloween Invitations. I'm not having a party but I wanted an excuse to make some Halloween Cards. Here in the UK we don't give cards at Halloween but I still wanted to make some so I thought I could make the cards invitations instead.

I added a strip of Black Glimmer Paper to the bottom of the card and added You're Invited using the A Dozen Thoughts stamp set and the Word Window Punch.


The designs are so great they really don't need much adding to them. I love the bats, ghosts & spider patterned paper I've used in these cards but there are some other great patterns in the pack of paper such as the gravestones & crows and the Tangerine Tango stripes.

In each pack of Happy Haunting DSP, you get 12 sheets of 12" x 12" paper. The pack includes 2 sheets of each of the 6 double side designs and it only costs £10.00!
You can also buy a pack of coordinating cardstock for £6.50 which contains 24 A4 sheets of cardstock. 8 sheets each of Basic Black, Tangelo Twist, Very Vanilla.

There are so many projects you can make with this DSP. Above are some ideas the creative gurus at Stampin' Up! have featured in the Autumn Winter Catalogue. If you would like a catalogue, please let me know by sending an email to info@handmadebykim.co.uk.

Handmade card using the Stampin' Up! Floral Wings Photopolymer Stamp Set - Cath Kidston style
Wednesday, August 26, 2015

The stamp set I've used today is just gorgeous. Its one of the hostess sets that you can earn from qualifying orders from Stampin' Up! annual catalogue.
I absolutely adore this colour combination, I first saw it used in a project on a fellow demonstrators blog - my friend and fellow Pinkie Sarah Berry. Click here for a peek at her fablous project using the same stamp set and the same colours.
Naturally when I came to use this set for the first time I couldn't think of any other colour combination to use except for this one - I've used Pool Party, Melon Mambo & Old Olive. It has a Cath Kidston look about it, don't you think?

These little boxes can be purchased ready to make from my online shop, they are great for a last minute gifts or favours and are perfect for holding little treats such as chocolates & sweets, jewellery or even a small candle. I've decorated mine to match the card with the polka dot pattern from the Subtles Designer Series Paper Stack.

Photopolymer stamps are perfect for the Floral Wings stamp set set as you need to be able to see through the stamp to achieve perfect 3 layers of stamping. I started with Pool Party Ink for the main butterfly shape and image, then stamped the flowers in Melon Mambo, finishing off with the leaves in Old Olive. The effect is striking and I love it.
I used the large butterfly die from the Bold Butterfly Framelits Dies to cut out the butterly. I used my magnetic plate with my big shot to make sure the framelit didn't move. These framelits also coordinate with the Watercolour Wings stamp set, which is amazing. I think the framelits are well worth investing in as you can use them with several coordinating sets for lots of different looks.

Just before I go...... I know its completely impossible to tell from my picture, but I wanted to tell you all about what I've used to add something a little different to my project. Its called an Action Wobble Spring. I've used this spring to attach the butterfly to the card. It not only gives the butterfly a 3D effect, it also allows the butterfly shape to move slightly with a fun wobble motion. We used one of these for the first time at the quarterly training event in July so I've been waiting for an opportunity to use one of these in my projects. Check out this short video to see what they are all about.
Thanks for stopping by - come back on Saturday for my first Halloween themed project.


These lovely little jars are from Tinware Direct and I just had to decorate them.
I find that when you go on holiday you don't really want to take full size tubs of creams, so I took some of my favourite Lush products - Ultrabland cleanser, British Nanny moisturiser and Celestial moisturiser and some standard hand cream and foot cream and decanted them into these jars.

I used designer series paper scraps I had from the retiring All Abloom Stack and I punched out the circles for the lid with the 1 3/4" Circle Punch and then cut a 2cm strip to wrap around the jar.
I used Sahara Sand ink to sponge all of the edges to give it a vintage feel.

For the labels I used a font called 1942 Report that I also used for my previous project and I punched out the labels with the Word Window Punch.
This coming Saturday is not only my birthday but I am also taking part in the fabulous Pinkies Blog Hop. Make sure you come back to see the card I have made using new products from the new Stampin' Up! Annual Catalogue. You will also get to see lots of other projects from my fabulous Pinkie crafty sisters.


You could say I am a little obsessed with tins at the moment. My upline Michelle Last created an amazing project for us at the craft weekend I attended in Birmingham recently. So naturally I had to ask where she got the tins from.
The company is called Tinware Direct and you can buy tins in bulk or as samples - 10 samples for £10 or 20 samples for £20. I bought a wide variety of samples and when I looked at the tins I have used in this project I immediately thought cotton bud container.... Don't ask me why!

With a lot of my favourite DSP retiring I thought it would be a perfect project to use up some of my scraps.

I have kept the design simple and consistent. I also didn't want a lot of embellishments or details as you need to be able to handle these containers everyday and possibly pack them in your cases for holidays.
This project was really quick. I cut some scraps of my Subtles Designer Series Paper to fit the lid, rounded the corners and sponged the edges with Sahara Sand Ink.
I then wrapped burlap ribbon around the tin and added a 2cm strip of DSP. I wish I had sponged the edges on these pieces but I forgot!!
I then found a quirky font called 1942 Report and printed labels which I punched out using the Word Window Punch.
I hope you have enjoyed my project today. I love how being creative with paper crafts is not limited to cards and gift boxes. Come back and see my next project using DSP scraps and Tinware products on Wednesday!


I am really pleased that the Sheltering Tree stamp set has carried over to the new catalogue. I hadn't had a chance to use it yet and with a few family birthdays approaching I thought now would be the perfect opportunity. Its lovely to stamp with and I can't wait to use it again.
With winter long behind us now and summer on its way, I found it fitting to give these cards a spring
like feel.... This is what I love about this set, just a change of colours and your projects can look like any of the four seasons.
like feel.... This is what I love about this set, just a change of colours and your projects can look like any of the four seasons.

The additional stamps included are so cute. The broom, the swing and the bicycle are all fabulous and with the stamps being photopolymer you can easily see where to line up your stamp where you want them to be.

I ùsed my Scoring Stylus tool and Simply Scored scoring board to make a raised border. I also used various punches and layers to give the sentiments some dimension.

I hope you have enjoyed my card project today. Come back on Saturday for my next project using those scraps of DSP that you can't bear to throw away.


Just a quick post from me today. I wanted to show you the name badge I made for the Stampin' Up! Regional Training event I attended on Saturday. I hope you like it!


This card is my very first attempt of Punch Art. One of my good friends daughter was turning 2 a few weeks ago and she is obssessed with Peppa Pig, so, after a quick search on Pinterest, I knew exactly what I wanted to make.
I had a lot of fun making this card as Punch Art was a new technique and the style was very much out
of my comfort zone. I was absolutely thrilled to find out that Florence loved her card!
There isn't one single card that I based this on, to see the many different versions on Pinterest just click here.
The Envelope Punch Board is really handy for when you need an envelope to match and fit a handmade card.
Here is the custom envelope I made using the Subtles Designer Series Paper Stack.
Here is the custom envelope I made using the Subtles Designer Series Paper Stack.

I hope you have enjoyed this project. Make sure you check our the Retiring Products...there are some great bargains at the moment.
Subscribe to:
Posts (Atom)


Social Icons