
Showing posts with label Lots of Labels Framelit Dies. Show all posts
Showing posts with label Lots of Labels Framelit Dies. Show all posts

Welcome to the Hello! Annual Catalogue 2016-2017 Blog Hop!
You’ll be hopping around 12 amazing Stampin’ Up!® Independent Demonstrators blogs, each with an inspirational project, featuring new catalogue products.
Currently you’re visiting Kim Price from Somerset in the UK. Hello there!
You can continue hopping by using the previous and next buttons at the end of this post. Now, let’s scroll down to see what I’ve been making.

I added a few die cut flowers using the Botanical Builder Framelit Dies, combining Night of Navy and Flirty Flamingo, which just pops. I love this colour combination!

I used the lovely Botanical Builders Framelit Dies to decorate two of the cards and the Butterflies Thinlits Dies and the Bold Butterfly Framelits Dies to decorate the others.

All three cards showcased bellow feature a stamped background using the Touches of Texture stamp set in Flirty Flamingo and Night of Navy ink and a die cut flower or butterflies layered over it.

Thank you for visiting today.
The next stop is the talented Jolan Meurs.
There’s lots of inspiration to be found in this group – and you don’t want to miss it!


Kim Price - UK <— You’re here!

You can visit my online shop 24/7 to purchase these products
DSP, Cardstock & Ink
- Whisper White Cardstock (106549)
- Night of Navy Cardstock (106577) & Ink (126970)
- Flirty Flamingo Cardstock (141421) & Ink (141397)
- Floral Boutique Designer Series Paper (141663)
Stamp Sets
- "Enjoy The Little Things" from the Layering Love Stamp Set (141965)
- “Just For You" and from the Watercolour Words Stamp Set (138702)
- "Happy Birthday" from the Stylized Birthday Stamp Set (141828)
- "Thank You So Much" from the Thankful Thoughts Stamp Set (141522)
- Background from the Touches of Texture Stamp Set (143251)
Thinlits & Framelits
- Butterflies Thinlit Dies (137360)
- Bold Buttery Framelit Dies (138135)
- Lots of Labels Framelits (138281
- Botanical Builder Framelit Dies (140625)
Accessories
- Rhinestone Basic Jewels (119246)
- Delicate White Doilies (141701)


I hope you and your family had a lovely Christmas and are looking forward to 2016 and all that it brings.
Myself and my husband had a quiet Christmas at home this year. We started off with an amazing meal at Marco Pierre White Steakhouse Bar & Grill in Congresbury near Bristol on Christmas Eve. The food was amazing, for a special treat and a truly memorable meal, we decided to share a Chateaubriand, essentially a large fillet of beef, intended to be shared and never for just one. This dish came with the most amazing onion rings, a grilled tomato and a small copper pan of triple cooked chips. A little jug of Bearnaise Sauce was the perfect accompaniment.
We opted out of starters so we could make sure we finish this beautiful steak and still have room for dessert - but we couldn't resist the warm basket of beautifully baked sourdough bread. For dessert I had a very sticky toffee pudding and Phil had a raspberry knickerbocker glory. It was a lovely relaxing evening with stunning food. The service was excellent and the waitress very kindly offered to take a photo of us.

Whilst I did miss hostessing, it was also lovely to put my feet up and relax and cook Christmas dinner at my own leisure. I cooked roast turkey and all the trimmings - my all-time favourite roast is rib of beef but my husband always says "its not Christmas if you don't have turkey", so turkey it was and it will always be. I'm not the biggest fan of turkey so I always make Jamie Oliver's Get Ahead Chrismas Gravy to serve with the meat, trust me, it makes all the difference to the meal and is well worth the effort to make it.
As we were spending Christmas apart from family, I wanted to make something handmade to give as presents. I made 6 of these little hampers, containing little treats to eat and drink and I really hope everyone liked them and found a little something inside that they really enjoyed. Naturally I couldn't post pictures of these until after Christmas, so here is my version of a Handmade Christmas Hamper and the little treats included within it.

These biscuits are so yummy, they are Sainsbury's Taste the Difference Belgian Milk Chocolate Shortbread Wreaths. I am glad I bought them when I did as they were sold out in no time. I packaged 2 biscuits in 4" x 6" cellophane bags to include in the hamper.
I made a label using the Lots of Labels Framelits and some kraft cardstock. I then stamped 'Chocolate Shortbread' using the Alphabet Rotary Stamp and underneath stamped the winter scene using the Cozy Christmas stamp set. I added a white star punched from Dazzling Diamonds Glimmer Paper and also coloured in the snow on the roof with a Wink of Stella glitter pen which will be available in the new Spring Summer catalogue. I stapled the label to the cellophane bag using the Handheld Stapler.

Here is another favourite of mine - Sainsbury's All Butter Fudge. It's very crumbly fudge and at £1.25 for 200g it's an absolute bargain. I put 4 little pieces of fudge into a 3" x 5" cellophane bag. The label is Kraft cardstock punched out with the Decorative Label Punch. Again, I used the Alphabet Rotary Stamp to stamp the word 'Fudge' and then added the sentiment 'Happy Winter' from the Happy Scenes stamp set. The little bird has been stamped using the Festival of Trees stamp set. I used the handheld stapler again to fix the label to the cellophane bag.

A hamper wouldn't be a hamper without some good old English tea so I ordered individually wrapped Twinings English Breakfast tea bags from eBay.
I made these cute tea bag holders using some 6" x 6" Designer Series Paper and added a sentiment using the Washi Label Punch and stamped 'Season's Greetings' using the Happy Scenes stamp set.
I used a video tutorial I found on YouTube by Joan Robertson to make the tea bag holder - click here to watch it, it's so easy and quick to make and each one holds two tea bags.

I got the clip lid glass jars from Sainsburys for £1.25 each - unfortunately I can't find them online but they are similar to the Kilner Spice Jars. They are perfect as once the hot chocolate has been used up, the glass jars can be reused in either the kitchen, or even in the craft room.
I used the Alphabet Rotary Stamp to stamp 'Hot Chocolate' onto some Kraft cardstock. I then punched out little tags using the Washi Label Punch. A star punched from Gold Glimmer Paper punched using one of the Itty Bitty Accents punches and fixed to the tag with a glue dot is I needed to finish off the jar. To fix the label to the jar, I punched a small hole using the 1/8" Circle Handheld Punch and threaded through some Linen Thread before tying the label onto the glass jar.

I couldn't forget the coffee drinkers so I bundled together a sachet of Nescafe Latte and Nescafe Cappuccino together with some Burlap ribbon, a Snowflake Wooden Element and some Silver Cord - I really love this!
The final items I included in the hamper weren't decorated - three mini Tiptree jars of Marmalade, Raspberry Jam and Honey. I also threw in a super cute mini jar of Nutella. They are really expensive on Amazon, but I managed to get these from the Airport in Sharm El Sheikh for a much cheaper price. Finally, I inlcuded a pack of shortbread fingers that I love and here you have it, my Handmade Christmas Hamper.
The basket I've used is the Small My Style Vintage White Storage Basket for £1.99. You can pick these up in lots of different shops. What I love about this hamper is that when you have taken everything out, you are left with a very useful storage basket to use! I love these baskets and I use these in all shapes and sizes to try and organise myself in my craft room.
Thank you for reading my blog post today. Enjoy the rest of the bank holiday, I'll be back soon with some projects made with new products from the Spring Summer Catalogue. I can't wait to show you a notebook set I've made!


Happy Halloween everyone!
I've just come back from a lovely holiday where I enjoyed 10 days of winter sun, sea and sand. I planned before I went away to make 17 Halloween Gifts to give to my team at work (and my other colleagues within the office) as a little treat instead of bringing back something from Egypt.

I knew for sure that I wanted to use the Kraft Tag A Bag Gift Bags as they are the perfect size to hold some Haribo and Maoam sweets and a Lollipop. I also knew I was definitely going to use the Witches' Night Photopolymer Stamp Set, the Lots of Labels Framelits and the amazing Spider Web Doilies. I just wasn't sure at all how I was combine all of these together.
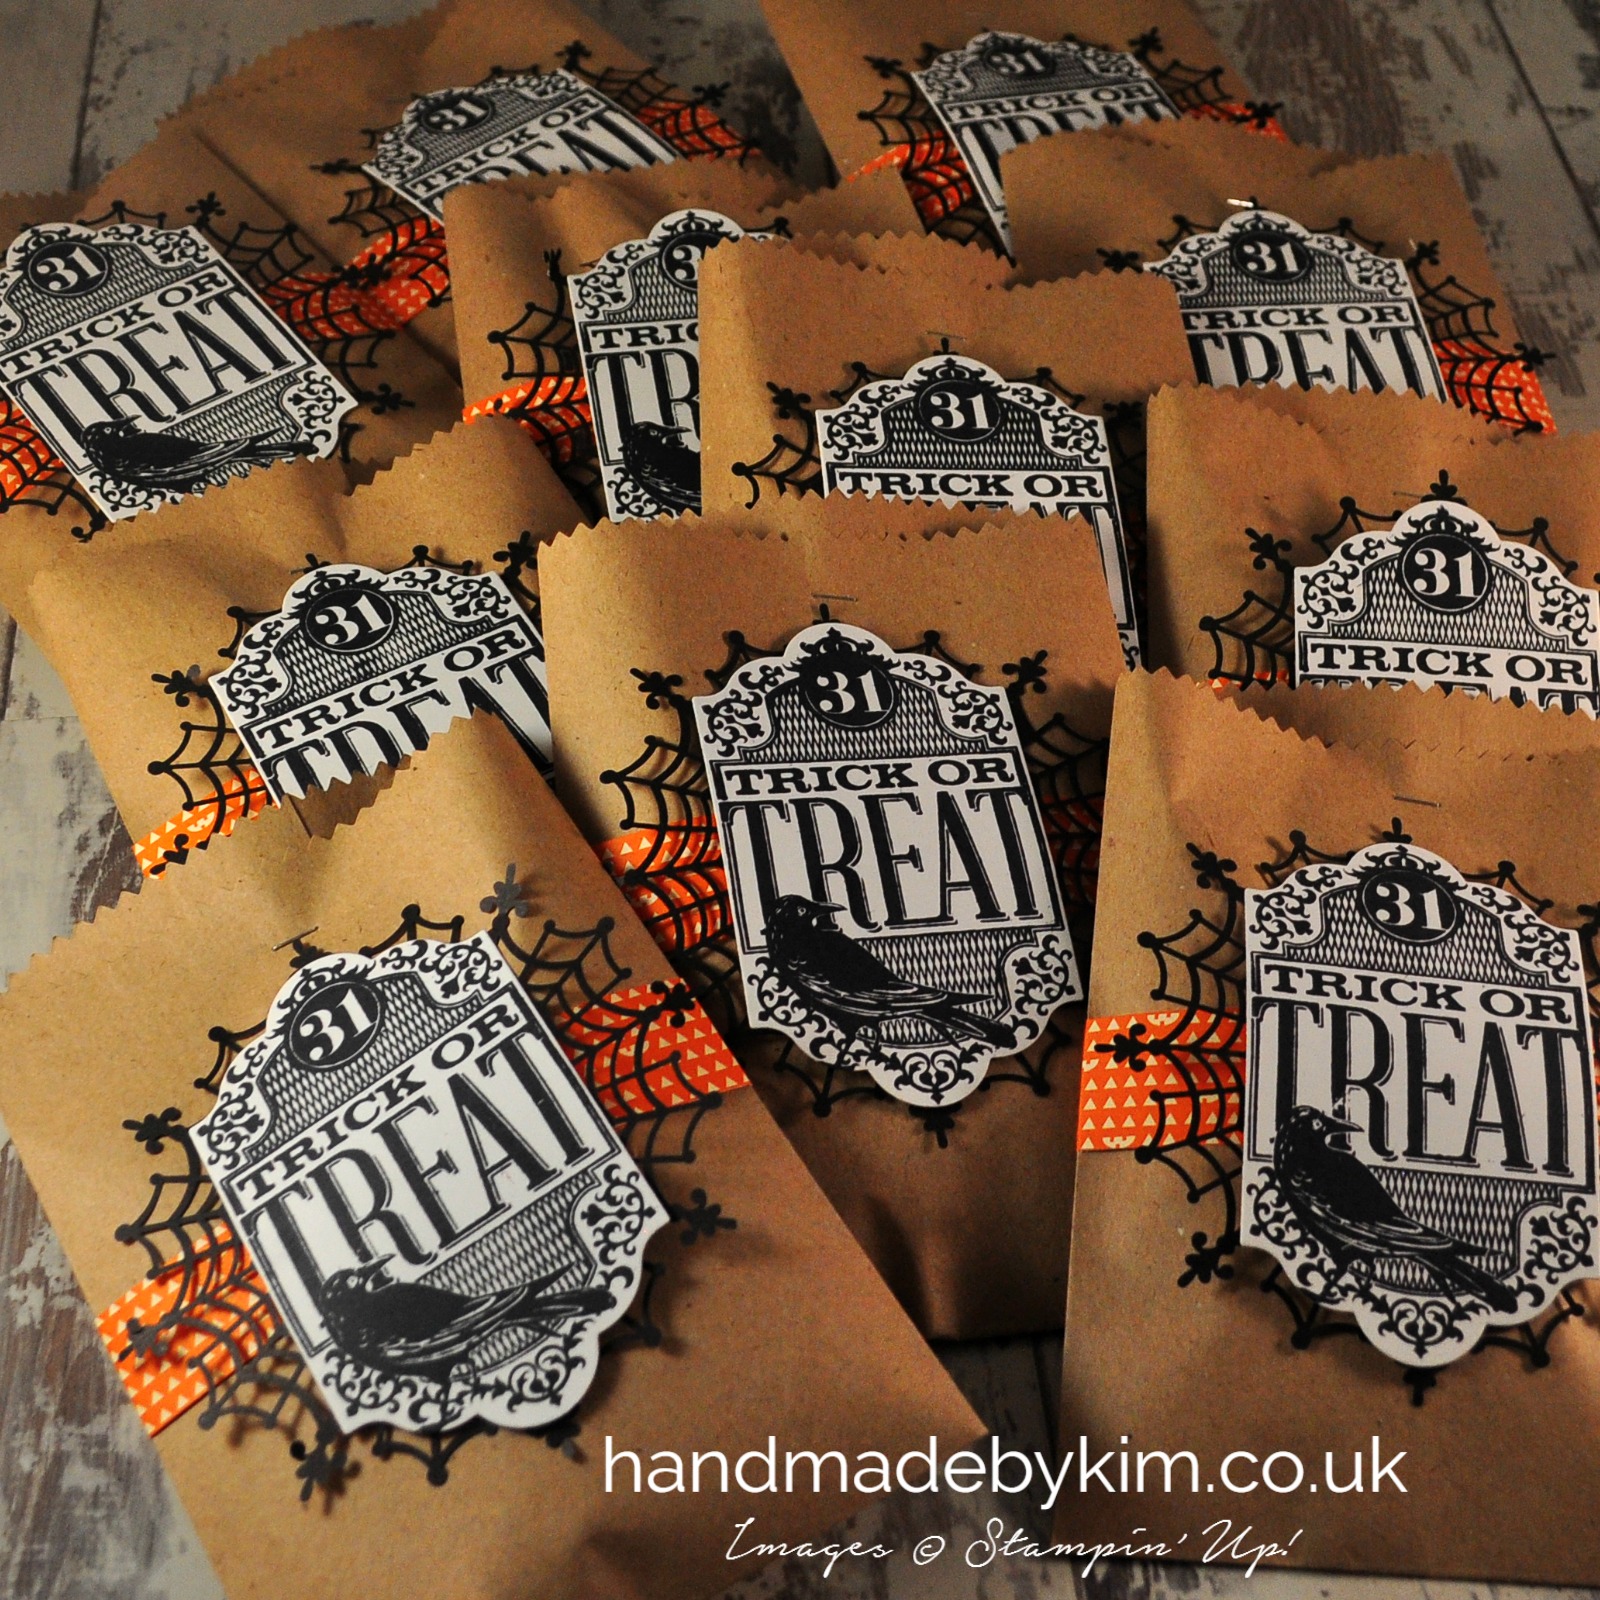
For me, the only colour (aside from Black) that signifies Halloween is Orange. I wanted to include this colour in my Trick or Treat Gift Bag so I made a 1 inch belly band using some patterned Tangelo Twist paper from the Happy Haunting DSP. I then adhered the centre of the Spider Web Doily to the front of the belly band. I stamped the beautifully detailed Trick or Treat image onto Whisper White cardstock and die cut this using the Lots of Labels Framelit Dies and adhered this on top of the doily.
That's it from me for now. Have fun if you are out trick or treating with your little ones tonight!

Subscribe to:
Posts (Atom)


Social Icons