
Showing posts with label Itty Bitty Accents Punch. Show all posts
Showing posts with label Itty Bitty Accents Punch. Show all posts

Pinkies Stampin' Up! 2016 Sale-a-Bration Blog Hop feat. Botanicals For You Stamp Set
Thursday, January 28, 2016

Thank you for joining us on another Pinkies Blog Hop! We're showcasing lots of gorgeous projects using new Stampin' Up!® products that you can earn free during Sale-a-Bration. Simply use the buttons at the end of each post to keep hopping!
If you have arrived here from Jan's blog, thanks for stopping by! I really hope you enjoy looking at the projects we have made!

For today's project I've used the Botanicals For You stamp set that you can earn for free during Sale-a-Bration for every £45 you spend. This large sentiment is perfect for embossing and featuring as the centre piece of the card. I made a similar version of this card a few weeks ago and I promised a stepped up version of this card - and here it is!
To step it up, I added an additional layer using a Silver Foil and also added a background using the Watercolour Wash Stamp Set and Soft Sky ink.
I also stamped the flowers onto Vellum using Versamark Ink and Silver Stampin' Emboss Powder before punching them out with the Itty Bitty Accents flower punch.
As in my previous version, I added a Rhinestone to the centre of each flower but to step it up, you can just about see either side of the flowers are some silver embosssed leaves.

I made another version of this card and used Gold Stampin' Emboss Powder instead of Silver, Sahara Sand Ink instead of Soft Sky and Pearls instead of Rhinestones inside the flowers.
Which is your favourite?

I decorated the inside of these cards using the sentiment On Your Special Day, perfect for many different occasions - engagements, marriages, anniversaries, special birthdays and more.
I stamped the sentiment and leaves using Versamark Ink and Emboss Powder onto Shimmery White Cardstock. I then added 3 more flowers, to match the front of the card. I layered this onto a Foil Sheet and adhered it to the centre of the inside using Tear & Tape Adhesive.

I love Sale-a-Bration! Did you know that Stampin' Up! run Sale-a-Bration every year from the beginning of January until the end of March. During this time you can choose one product from the Sale-a-Bration catalogue for every £45 you spend. And if you spend over £200, you can choose £20 of products in addition to the 10% of Stampin' Rewards you would receive. There are 7 stamp sets, 3 paper packs and a Project Life card collection to choose from.
Its also the best time of year to join Stampin' Up! as a demonstrator as you will receive an extra £30 of products in your starter kit. You still pay £99 but instead of choosing £130 products, you can choose £160 - how great is that? If you don't want to be a demonstrator, that's okay, you can still sign up to receive discount on all of the products you purchase, be one of the first to see new catalogues and attend exclusive events. Want to find out more, let me know!
I hope you've enjoyed today's Blog Hop! Have you chosen which free product you are going to choose when you next order?
Click Next to see lovely Michelle's blog and the gorgeous project she has made using free Sale-a-Bration products.


Soft Sky & Silver Version
Sahara Sand & Gold Version

Just For You.... Handmade Card created with Sale-a-Bration Freebies by Stampin' Up!
Saturday, January 16, 2016

I wanted to take the opportunity today to say hello and welcome to all my new subscribers! Thank you so much for subscribing, it means a lot to me and I hope you enjoy looking at the projects I make.
Today's project has been made using a free stamp set that I have earned during Sale-a-Bration.
For every £45 you spend during Sale-a-Bration you can choose one item from the Sale-a-Bration catalogue for FREE. Click here to browse the Sale-a-Bration catalogue
You can do so much with this stamp set but I wanted to show you how lovely it can be with this simple design in silver and white. I'll be working on a stepped up version of this card so keep and eye out for this on my blog !
I stamped the sentiment Just For You in Versa mark Ink and used Silver Embossing Power and my Heat Tool to give this shiny silver effect. I punched out some flowers from Vellum cardstock using one of the Itty Bitty Accent punches and added Rhinestones to the centre.
Have a great weekend!


Thank you for joining us on another Pinkies Blog Hop! We're showcasing lots of gorgeous
projects using products from the new Stampin' Up!® Spring/Summer Catalogue. Simply use the
buttons at the end of each post to keep hopping!
If you have arrived here from Sarah's blog, thanks for stopping by! Isn't Sarah's card so cute! I really hope you enjoy looking at the projects we have made!
Today's project is a stationery tin and set of notebooks I've made using the new Birthday Bouquet Designer Series Paper. Isn't it just gorgeous?

I made two sets as Christmas presents - one using Blushing Bride cardstock and the other using Pool Party cardstock. Both of these colours match this paper perfectly.
The Birthday Bouquet Designer Series Paper pack contains 12 sheets of 12" by 12" cardstock and each piece has a design on both sides (6 designs in total). The 6 different designed papers contain one or more of the following colours: Blushing Bride, Mint Macaron, Mossy Meadow, Old Olive, Pool Party, Soft Suede, Watermelon Wonder and Whisper White.
I think you could quite easily use Old Olive or Watermelon Wonder cardstock alongside this paper, or even Mint Macaron.

If you've been following my blog, you may have seen me using this tin before in my Typeset Specialty Series. Its a great tin for this sort of project as it can fit a number of items inside - this stationery set includes a shopping list, notepad (including post it notes), a mini notebook and a gold sparkly glitter nail file.

I've used my all-time favourite centre piece for the front of the tin and notepads which consists of a die cut butterfly from cardstock and vellum. I've used the medium sized die from the Butterflies Thinlits Dies for the front of the tin and the notebook and the small butterfly die from the Bold Butterfly Framelits Dies for the shopping list and mini notebook. I LOVE these dies, which is why you will find them in lots of my projects! The new Big Shot Die Brush on page 19 of the catalogue is perfect for popping out all of the little pieces from the butterflies! Its my new best friend.

I hope you enjoyed looking at my project today - make sure you leave a comment to let me know you stopped by!
Next up is Tracy and she has made a fabulous card for you today. Enjoying hopping and I hope to see you again next time.


I hope you and your family had a lovely Christmas and are looking forward to 2016 and all that it brings.
Myself and my husband had a quiet Christmas at home this year. We started off with an amazing meal at Marco Pierre White Steakhouse Bar & Grill in Congresbury near Bristol on Christmas Eve. The food was amazing, for a special treat and a truly memorable meal, we decided to share a Chateaubriand, essentially a large fillet of beef, intended to be shared and never for just one. This dish came with the most amazing onion rings, a grilled tomato and a small copper pan of triple cooked chips. A little jug of Bearnaise Sauce was the perfect accompaniment.
We opted out of starters so we could make sure we finish this beautiful steak and still have room for dessert - but we couldn't resist the warm basket of beautifully baked sourdough bread. For dessert I had a very sticky toffee pudding and Phil had a raspberry knickerbocker glory. It was a lovely relaxing evening with stunning food. The service was excellent and the waitress very kindly offered to take a photo of us.

Whilst I did miss hostessing, it was also lovely to put my feet up and relax and cook Christmas dinner at my own leisure. I cooked roast turkey and all the trimmings - my all-time favourite roast is rib of beef but my husband always says "its not Christmas if you don't have turkey", so turkey it was and it will always be. I'm not the biggest fan of turkey so I always make Jamie Oliver's Get Ahead Chrismas Gravy to serve with the meat, trust me, it makes all the difference to the meal and is well worth the effort to make it.
As we were spending Christmas apart from family, I wanted to make something handmade to give as presents. I made 6 of these little hampers, containing little treats to eat and drink and I really hope everyone liked them and found a little something inside that they really enjoyed. Naturally I couldn't post pictures of these until after Christmas, so here is my version of a Handmade Christmas Hamper and the little treats included within it.

These biscuits are so yummy, they are Sainsbury's Taste the Difference Belgian Milk Chocolate Shortbread Wreaths. I am glad I bought them when I did as they were sold out in no time. I packaged 2 biscuits in 4" x 6" cellophane bags to include in the hamper.
I made a label using the Lots of Labels Framelits and some kraft cardstock. I then stamped 'Chocolate Shortbread' using the Alphabet Rotary Stamp and underneath stamped the winter scene using the Cozy Christmas stamp set. I added a white star punched from Dazzling Diamonds Glimmer Paper and also coloured in the snow on the roof with a Wink of Stella glitter pen which will be available in the new Spring Summer catalogue. I stapled the label to the cellophane bag using the Handheld Stapler.

Here is another favourite of mine - Sainsbury's All Butter Fudge. It's very crumbly fudge and at £1.25 for 200g it's an absolute bargain. I put 4 little pieces of fudge into a 3" x 5" cellophane bag. The label is Kraft cardstock punched out with the Decorative Label Punch. Again, I used the Alphabet Rotary Stamp to stamp the word 'Fudge' and then added the sentiment 'Happy Winter' from the Happy Scenes stamp set. The little bird has been stamped using the Festival of Trees stamp set. I used the handheld stapler again to fix the label to the cellophane bag.

A hamper wouldn't be a hamper without some good old English tea so I ordered individually wrapped Twinings English Breakfast tea bags from eBay.
I made these cute tea bag holders using some 6" x 6" Designer Series Paper and added a sentiment using the Washi Label Punch and stamped 'Season's Greetings' using the Happy Scenes stamp set.
I used a video tutorial I found on YouTube by Joan Robertson to make the tea bag holder - click here to watch it, it's so easy and quick to make and each one holds two tea bags.

I got the clip lid glass jars from Sainsburys for £1.25 each - unfortunately I can't find them online but they are similar to the Kilner Spice Jars. They are perfect as once the hot chocolate has been used up, the glass jars can be reused in either the kitchen, or even in the craft room.
I used the Alphabet Rotary Stamp to stamp 'Hot Chocolate' onto some Kraft cardstock. I then punched out little tags using the Washi Label Punch. A star punched from Gold Glimmer Paper punched using one of the Itty Bitty Accents punches and fixed to the tag with a glue dot is I needed to finish off the jar. To fix the label to the jar, I punched a small hole using the 1/8" Circle Handheld Punch and threaded through some Linen Thread before tying the label onto the glass jar.

I couldn't forget the coffee drinkers so I bundled together a sachet of Nescafe Latte and Nescafe Cappuccino together with some Burlap ribbon, a Snowflake Wooden Element and some Silver Cord - I really love this!
The final items I included in the hamper weren't decorated - three mini Tiptree jars of Marmalade, Raspberry Jam and Honey. I also threw in a super cute mini jar of Nutella. They are really expensive on Amazon, but I managed to get these from the Airport in Sharm El Sheikh for a much cheaper price. Finally, I inlcuded a pack of shortbread fingers that I love and here you have it, my Handmade Christmas Hamper.
The basket I've used is the Small My Style Vintage White Storage Basket for £1.99. You can pick these up in lots of different shops. What I love about this hamper is that when you have taken everything out, you are left with a very useful storage basket to use! I love these baskets and I use these in all shapes and sizes to try and organise myself in my craft room.
Thank you for reading my blog post today. Enjoy the rest of the bank holiday, I'll be back soon with some projects made with new products from the Spring Summer Catalogue. I can't wait to show you a notebook set I've made!

Happy Wonderful Christmas - an alternative way of using the Wondrous Wreath Stamp Set
Wednesday, October 28, 2015

I love that last years Christmas set Wondrous Wreath Photopolymer stamp set and the Wonderful Wreath Framelit Dies have carried over to this years Autumn/Winter catalogue.
I was thinking about recreating last years Christmas card because I didn't get a chance to blog about it..... but before I knew it I got totally sidetracked thinking about how else could I use this set without using the main wreath stamp.

The result is that I've made a card using the berries stamp (top right in the picture above) from the Wondrous Wrearh set. I used the sentiment included in this stamp set 'Happy Wonderful Christmas' and then punched out 5 flowers from Vellum cardstock using the Itty Bitty Accents punches and then added some Rhinestones.
I really like this effect. You could definitely use this stamp for any occasion, not just for Christmas. It also gave me another reason to use my current favourite cardstock - Whisper White Thick Cardstock.


Butterflies & Stripes - Handmade cards using the Floral Wings stamp set by Stampin' Up!
Monday, October 12, 2015

I had such a lovely time at our Quarterly Training yesterday. We made 5 amazing projects and I can't wait to take the inspiration I've gained from today and make some brand new projects.
I had to take some sample of work I had created so I took these cards and lots of other projects that are going to feature on my blog over the next few weeks,

I love the stripey paper in the DSP stacks. On this occasion, I didn't want to show a border of the cardstock underneath. I really like this effect so I might try it with some other DSP to see how it looks.

We're not all perfect (although I would like to be!) Sometimes things just don't go to plan. For example, on the card above my butterfly is not positioned in the centre. I didn't notice it at the time so when I did notice it, I was tempted to make the card from scratch again.

I hope you enjoyed my project today. Come back on Wednesday to see the Christmas Gift Box I've made.

Timeless Elegance Series - Simple Pillow Box Gift Boxes & Series Photo Collage
Wednesday, September 23, 2015

In the last 2 weeks I've showcased 7 different projects featuring the beautiful Timeless Elegance Designer Series Paper - the series has included a Stationery Tin, Thank You Card, Gift Bags, Wedding Card, Bag in a Box, Congratulations Card and to complete the series today we have a set of Pillow Boxes.


In the Autumn Winter catalogue there is a brand new die called the Square Pillow Box Thinlits Dies. You just run it through your big shot with some designer series paper and using your scoring tool and some adhesive, you have a gift box that's perfect to hold some chocolates, jewellery or even a gift card.

I've kept the design quite simple and stamped a tag using the Merry Everything stamp set onto Very Vanilla cardstock in Basic Black Archival Ink. I have used the coordinating Note Tag punch to punch it out and added it to the Pillow Box with some Stampin' Dimensionals.
You can buy the Merry Everything stamp set and Note Tag Punch in a bundle where you save 15%. For £26.25 plus P&P you get 5 stamps that can be used for Birthdays, Christmas & Halloween. This set is useful to make tags in super quick time, perfect when making multiple tags for Christmas presents.
To finish off the design, continuing with the simple theme, I added a small star / small heart punched out of Gold Glimmer paper using the Itty Bitty Accents punches. I think its just what it needed without being too fussy.

I really hope you've enjoyed my series featuring the gorgeous Timeless Elegance Designer Series Paper. This paper is so elegant and it can be dressed up or down to suit your project.
You can order a pack of the Timeless Elegance Designer Series Paper from my online shop today for just £10.00 plus P&P. Just click on the picture below in the supplies list.
You can order a pack of the Timeless Elegance Designer Series Paper from my online shop today for just £10.00 plus P&P. Just click on the picture below in the supplies list.

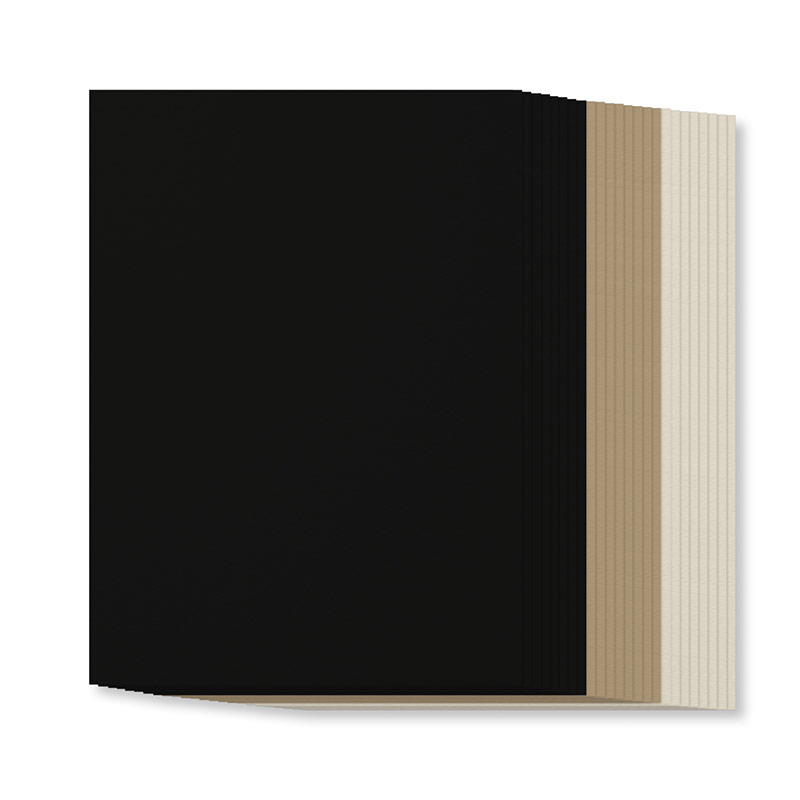
There is also a handy pack of coordinating cardstock which contains 24 sheets - 8 A4 sheets of Basic Black, 8 A4 sheets of Sahara Sand and 8 A4 sheets of Very Vanilla. It only costs £6.50!
If you would like to add this to your order, simply search Timeless Elegance A4 Cardstock Assortment Pack (code 139019) in my online shop.
If you would like to place an order, please visit my online shop or get in touch with me by email - info@handmadebykim.co.uk.
Thanks for stopping by and I hope to hear from you soon!


So here it is, my brand new shiny series showcasing the gorgeous Timeless Elegance Designer Series Paper from Stampin' Up!. I have 7 different projects for you over the next 2 weeks and I really hope you enjoy them.
I LOVE this paper and I can honestly say that its the first paper that I've ever used up the entire pack . I normally hoard paper I love, I just can't seem to use it. It's like I am saving it all for a rainy day. Well this time I decided just to cut into it straight away. And since I decided that, I just kept using it and using it in my projects.
With all of my finished projects, I put them in my basket ready for photographing. Seeing them together made me realise that I had an opportunity to do another series.... so I added a few more projects so I had 7 in total - a few didn't make the cut but hey ho, we all know that when crafting things don't always look the way we envisaged them to. Some of the projects have been finished for a little while now and to be honest its been killing me having to patiently wait to show them to you.
I am really excited to show you today this gorgeous stationery tin I've made. Isn't it just fabulous?

Now I can't take credit for this gorgeous design, my upline Michelle Last created this as a project for our craft weekend in Birmingham way back in April. I've just taken Michelle's design and changed the colours to work with the Timeless Elegance Designer Series Paper. Click here to see Michelle's design.
I love Michelle's version and still have my pink tin in my craft room along with the yellow version we also made. Even though they would make great gifts, I just can't seem to be able to part with them - and I am glad as they gave me the inpsiration to make this tin.

You can buy these tins from Tinware Direct. I think its amazing how you can transform a metal tin with some beautfiul paper and a few accessories. I've used Black Glimmer Paper for the Banner & Flower and Basic Black Cardstock & Vellum Cardstock for the butterfly.

Still to come over the next two weeks I have a thank you card, a set of gift bags, a wedding card, the famous bag in a box, a congratulations card and to finish a pair of pillow boxes. Come back on Mondays, Wednesdays & Saturdays to see these projects or subscribe to by blog by clicking here.

Fun colour pop Christmas gift tag featuring the Jolly Christmas stamp set & Stampin' Glitter
Monday, September 7, 2015

Did you enjoy Saturdays blog hop? Weren't the projects fabulous? I love seeing how different people use the Stampin' Up! products - everyone is so creative and has their own unique style. From seeing these projects, I've added a few items to my next order, just don't tell my husband!
This project that I am showcasing today I made just for fun. I love the Kraft paper look at Christmas. I usually wrap Christmas presents in brown paper and decorate them with ribbon and handmade gift tags. Each years look is slightly different and this year I am going to start early. Last year didn't quite go to plan and for the first time in ages I had to use shop bought tags!! I know there's no harm in that and I don't think for one minute that my family even noticed, but I like to be individual so I did feel like I was cheating a bit.

I started making this gift tag by stamping the reindeer from the Jolly Christmas stamp set in Versamark ink onto Kraft cardstock. I then sprinkled over Heat & Stick Powder, tapping off the excess and putting this back into the pot. By heating the powder with a heat gun it becomes sticky, so you need to quickly sprinkle over the Stampin' Glitter before it dries. Tap off any glitter that doesn't stick to the powder and put this back into the pot. To set the glitter in place, you neec to heat it one more time with the the heat gun.
I love this effect and I certainly want to include this look into this years Christmas cards! I don't have a design created yet but after another month of crafting with these fab products from the new Stampin' Up! Autumn Winter Catalogue, I'll try and incorporate all of my favourite looks into either one or several different designs.

To finish making the tag, I used one of the Circles Collections Framelits Dies to cut out the reindeer but I wasn't sure what to do with it next.... after some pondering I decided to have some fun and pair it with a really bright colour for a modern look. I chose Melon Mambo - doesn't it look amazing against the Kraft cardstock?
I cut the tag and stamped stars from the Jolly Greetings stamp set in Black Archival ink. I added a Black Glimmer Banner and used Stampin' Dimensionals to add the Kraft cardstock to the tag. It looked like it needed something else which I why I added the Melon Mambo stars punched using one of the punches from the Itty Bitty Accents set. Okay so this is not my usual look but like I said this was just for fun! Do you ever craft outside of your comfort zone?
Now back to my comfort zone.....starting from Wednesday I have 7 projects using the gorgeous Timeless Elegance DSP that I can't wait to show you. If you don't subscribe - I blog 3 times a week on Mondays, Wednesdays & Saturdays - see you then!


I wanted to show you today how lovely the new Tags & Labels dies are. There are 2 main designs within this Framelits set and each design has 5 layering dies - perfect for sentiments!

I also just wanted to let you know that there are only a few days left to join my team and make the most of the fabulous offer of choosing any 2 stamp sets of your choice from the Annual Catalogue. If you are interested in this fantastic offer, or just want some more information, please contact me by email by clicking here. This offer expires on 30th June. If you are not looking to join Stampin' Up! as an Independent Demonstrator, then click here to subscribe to my blog to see what craft projects I make.
Subscribe to:
Posts (Atom)


Social Icons