
Showing posts with label Bold Butterfly Framelits Dies. Show all posts
Showing posts with label Bold Butterfly Framelits Dies. Show all posts

Welcome to the Hello! Annual Catalogue 2016-2017 Blog Hop!
You’ll be hopping around 12 amazing Stampin’ Up!® Independent Demonstrators blogs, each with an inspirational project, featuring new catalogue products.
Currently you’re visiting Kim Price from Somerset in the UK. Hello there!
You can continue hopping by using the previous and next buttons at the end of this post. Now, let’s scroll down to see what I’ve been making.

I added a few die cut flowers using the Botanical Builder Framelit Dies, combining Night of Navy and Flirty Flamingo, which just pops. I love this colour combination!

I used the lovely Botanical Builders Framelit Dies to decorate two of the cards and the Butterflies Thinlits Dies and the Bold Butterfly Framelits Dies to decorate the others.

All three cards showcased bellow feature a stamped background using the Touches of Texture stamp set in Flirty Flamingo and Night of Navy ink and a die cut flower or butterflies layered over it.

Thank you for visiting today.
The next stop is the talented Jolan Meurs.
There’s lots of inspiration to be found in this group – and you don’t want to miss it!


Kim Price - UK <— You’re here!

You can visit my online shop 24/7 to purchase these products
DSP, Cardstock & Ink
- Whisper White Cardstock (106549)
- Night of Navy Cardstock (106577) & Ink (126970)
- Flirty Flamingo Cardstock (141421) & Ink (141397)
- Floral Boutique Designer Series Paper (141663)
Stamp Sets
- "Enjoy The Little Things" from the Layering Love Stamp Set (141965)
- “Just For You" and from the Watercolour Words Stamp Set (138702)
- "Happy Birthday" from the Stylized Birthday Stamp Set (141828)
- "Thank You So Much" from the Thankful Thoughts Stamp Set (141522)
- Background from the Touches of Texture Stamp Set (143251)
Thinlits & Framelits
- Butterflies Thinlit Dies (137360)
- Bold Buttery Framelit Dies (138135)
- Lots of Labels Framelits (138281
- Botanical Builder Framelit Dies (140625)
Accessories
- Rhinestone Basic Jewels (119246)
- Delicate White Doilies (141701)


Here are my swaps from Onstage Local in Telford. I made 75 of these and luckily managed to swap with 75 ladies in less than an hour before the event kicked off. The registration started at 7:30am. I hate early starts but I was looking forward to the day so much that it was almost like getting up to go on holiday, you don't mind as you know that what follows will be amazing.

The swaps I made coordinate with the team swaps I made on my previous post. I wanted to make something similar but different as I needed something that I could make easily in a much larger quantity. Its always hard to make this volume. Some ladies made gift boxes and gift bags, which is a huge task. I know how time consuming that can be as I made gift boxes last year and hanging scent pockets the year before. Even though my swap this year is only a card front, it still took me a long time to make due to the die cutting. Overall for both sets of swaps, I die cut 100 butterflies. My friend Aimee kindly lent me the small butterfly from the Bold Butterfly framelits dies so I could run two dies through my big shot at the same time. Honestly, this saved me SO much time. Thanks Aimee!!

To keep with the theme of my other swap each butterfly was literally covered in Wink of Stella Glitter in clear and the edge of the basic black cardstock was coated with Wink of Stella Glitter in gold. This took quote a while but I think it was worth it in the end. The effect, I hope, was to make the card feel opulent and special.
I absolutely adore the font used in this sentiment from the stamp set For The New Two. This set is retiring so make sure you order it soon before the stock runs out.

As promised, here are some pictures from Onstage Local. Unfortunatley I don't have any photos of the ladies I sat but I had a fab time with them and loved sharing all of the excitement of the day together with them - thanks ladies!
This was one of several large screens where we watched recorded content from the Onstage Live event in the states. I even watched a presentation by Brandy Cox. I was quite excited (even though she wasn't actually there) as her YouTube videos were what first got me interested in Stampin' Up!

I loved the effort Stampin' Up! went to this year to make the tables look pretty. There was a real wow factor when we walked in.
We all received a canvas bag and in it was a stamp set from the new catalogue, a fabric zipped pencil case and a pack of pens. We also had a coloured badge for Prize Patrol!

I couldn't believe that we also got this great notebook & 6 month planner. Its so nice I don't think I can even write in it.
You can also see my new swap bag in this picture. It wad handmade by Divas Intuition who I found on Etsy. It's perfect for swapping. The swaps I made fit in it perfectly but I needed another bag for the swaps I received.

Here is a table of 3D swaps on display. I was lucky enough to receive some of these. I haven't had a chance yet but I am planning on filming a YouTube video of all of the swaps I received.

Here is a make and take that we made. This is a card from the Oh Happy Day Card Kit. I should be receiving the kit next week as part of my pre order. Pre ordering is just one of the benefits from being a demonstrator and from attending the event.

Here is another make and take we made. I love this DSP!

And finally, here is a sneek peek of 3 new designer series paper packs. I love these patterns so expect to see these used in a lot of my projects this summer!


I hope you enjoyed seeing my swaps, photos from Onstage and the DSP sneek peek.
Come back on Wednesday to see my project that I've entered into a Washi Tape Challenge. The challenge was to find new ways in which to use Washi tape in a project, so come along and get inspired by all of the makes we've made.


Happy Mothers day! I hope you are having a lovely day either being spoilt or just putting your feet up. I am sat on the sofa watching a film while my husband is at work. Both my little cats are with me - bliss!
My Mum has just called to say she just received her flowers, I hope she likes them and the card I sent her!
Last weekend I ran my very first workshop and it was such fun! The theme was mothers day and we had 6 hours to make a matching collection of gifts - a card in a box, a bag in a box (which included the small tin that fit perfectly inside) and large tin.
I gave the four ladies Abi, Aimee, Kelly & Laura a choice of 2 designer series papers - Timeless Elegance or Birthday Bouquet. Abi and Aimee chose Birthday Bouquet and Kelly & Laura chose Timeless Elegance.
I like to give a choice as we all have different preferences. My personal favourite is Timeless Elegance but the Birthday Bouquet paper has really given me a chance to work with such pretty colours over the last few months, I shall be sad to see this one go (if you really like it but haven't ordered it yet, you've only got just over 2 months to order it!)

I ended up changing the design of the Birthday Bouquet card in a box at the last minute, instead of a Blushing Bride layer, I changed it to Pool Party and instead of the pink striped pattern of DSP on the bottom level, I changed it to the flowers, I feel this works so much better now.

I gave all four ladies packs containing all of the DSP and cardstock needed and also gave some options for them to change the colours of the flowers etc so they could make it their own. My version below uses Very Vanilla and Basic Black for the flowers, but Laura chose to use Sahara Sand instead of Very Vanilla and I think it worked just as well.

The bag in a box was fun to make. I prepped all of the cardstock so all we had to do was assemble it. It really is so easy, if you haven't made one yet, you must give it a go (click here to watch my friend Caroline Hallet's YouTube video on how to make it)

At the time I made my samples, I had run out of the lovely flowers so I had to use the ice cream cones paper, we didn't use this one on the day but the paper is so cute!
The little tin fits perfectly in the bag in a box and is perfectly for holding a piece of jewellery or gift card.

We also had time to make the large tin. This could be used for so many things. My friend Aimee discovered that it holds two hotel chocolate slabs perfectly - amazing! What is better than receiving a handmade designed tin of chocolates?

The tin is also the perfect size to include some small handmade cards, there are so many options on what you can do with it!
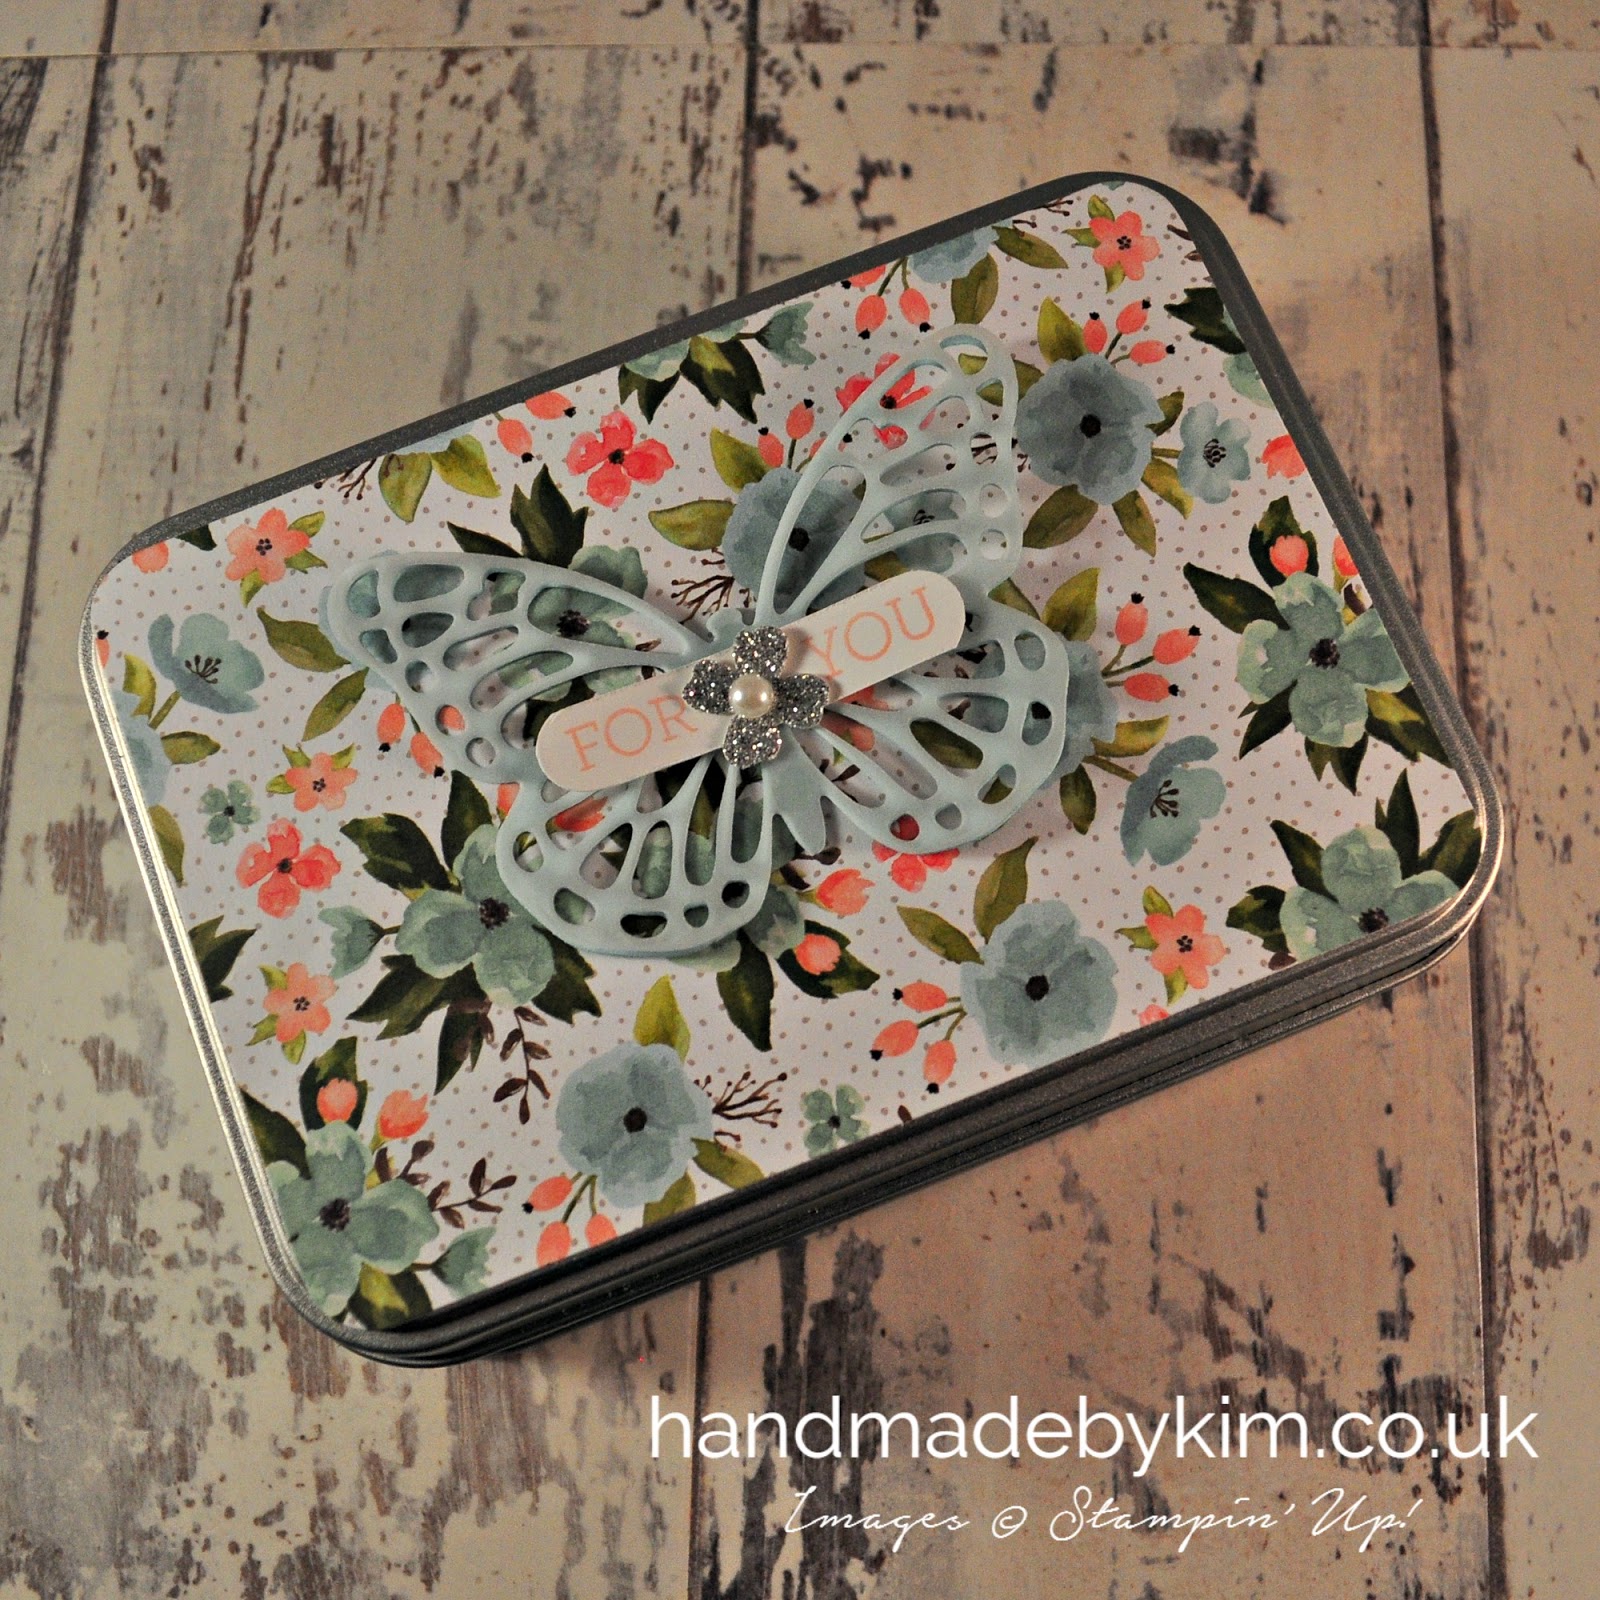
It was so much fun preparing for the workshop and setting up the room. I wanted it to be perfect and set up a table each so we had enough space plus a big shot station.

Each person had a thank you gift bag and card, a sheet of grid paper, a pack of supplies, the metal tins and a brown bag to take everything home in.
I had enough equipment for each pair to share a trimmer and scoreboard, plus I put together a toolkit together for each pair to share.
Aimee brought along her die cutting machine so we could double the amount of flowers cut with this and also using the big shot.

Here is everyone cutting their flowers using the Big Shot. I showed them the plastic bag technique (click here to watch my friend Smiley's youtube video on this) and also using the new Big Shot Die Brush, both techniques are amazing and absolutley essential when cutting large amounts of flowers or intricate dies.

Everyone did an amazing job with the projects - especially as it was Abi's, Kelly's and Laura's first time crafting.
This is what Abi made. I love how she has added a glitter butterfly to the card in a box and how she changed up the butterflies on both tins and the bag in a box. The pearls are simply stunning too and look great in the brads on the bag in a box.

Here is what Laura made. I really like how Laura used Sahara Sand instead of Very Vanilla. I also love her two layer butterflies she made with the Elegant Butterfly punch. The bottom later was cardstock ad the top layer was glimmer paper and some others were the opposite. I will be using this idea myself for sure!

Aimee has recently joined my team and is already in love with the products. I love how she has curled her butterflies on the large tin in the opposite direction to what I did and how she used the reverse side of the DSP on the bottom layer of the card in a box and also for the tins.

Kelly did a great job too, I am just sorry I didn't get a better picture. I love how she has placed two butterflies together on the small tin, its something I never would have thought of doing and it looks so great.

I hope you've enjoyed me sharing my first workshop with you today. I had such a great time and it was a pleasure seeing how well Abi, Aimee, Kelly and Laura did in completing these complex projects and making it their own.
Come back on Friday to see the thank you cards, thank you gift bags and tool kits in more detail!
Remember, if you would like to receive the tutorial on how to make the card in a box, please sign up to my newsletter. You can sign up in the side bar on the right hand side under "subscribe for exclusive content". If you receive my blog updates by email you will still need to sign up as I can't automatically add you without your permission.

Timeless Elegance version
Built for Free Using: My Stampin Blog
Birthday Bouquet version
Built for Free Using: My Stampin Blog


Thank you for joining us on another Pinkies Blog Hop! We're showcasing lots of gorgeous
projects using products from the new Stampin' Up!® Spring/Summer Catalogue. Simply use the
buttons at the end of each post to keep hopping!
If you have arrived here from Sarah's blog, thanks for stopping by! Isn't Sarah's card so cute! I really hope you enjoy looking at the projects we have made!
Today's project is a stationery tin and set of notebooks I've made using the new Birthday Bouquet Designer Series Paper. Isn't it just gorgeous?

I made two sets as Christmas presents - one using Blushing Bride cardstock and the other using Pool Party cardstock. Both of these colours match this paper perfectly.
The Birthday Bouquet Designer Series Paper pack contains 12 sheets of 12" by 12" cardstock and each piece has a design on both sides (6 designs in total). The 6 different designed papers contain one or more of the following colours: Blushing Bride, Mint Macaron, Mossy Meadow, Old Olive, Pool Party, Soft Suede, Watermelon Wonder and Whisper White.
I think you could quite easily use Old Olive or Watermelon Wonder cardstock alongside this paper, or even Mint Macaron.

If you've been following my blog, you may have seen me using this tin before in my Typeset Specialty Series. Its a great tin for this sort of project as it can fit a number of items inside - this stationery set includes a shopping list, notepad (including post it notes), a mini notebook and a gold sparkly glitter nail file.

I've used my all-time favourite centre piece for the front of the tin and notepads which consists of a die cut butterfly from cardstock and vellum. I've used the medium sized die from the Butterflies Thinlits Dies for the front of the tin and the notebook and the small butterfly die from the Bold Butterfly Framelits Dies for the shopping list and mini notebook. I LOVE these dies, which is why you will find them in lots of my projects! The new Big Shot Die Brush on page 19 of the catalogue is perfect for popping out all of the little pieces from the butterflies! Its my new best friend.

I hope you enjoyed looking at my project today - make sure you leave a comment to let me know you stopped by!
Next up is Tracy and she has made a fabulous card for you today. Enjoying hopping and I hope to see you again next time.


Note pad and shopping list made using the Birthday Bouquet Designer Series Paper by Stampin' Up!
Saturday, January 2, 2016

Happy New Year!
With a new year always comes a new Stampin' Up! catalogue and the fabulous Sale-a-Bration promotion. Now what could be better way to start the new year than that?
You can start ordering from the 2016 Spring Summer catalogue from 5th January 2016 from my online shop AND for every £45 you spend, you can choose a free item from the Sale-a-Bration catalogue!
You can download a copy of both the Spring Summer catalogue and the Sale-a-Bration catalogue from my blog on 5th January. Make sure you click here to subscribe to my blog posts so you are notified when its available.

For now, I will leave you with a taster of this gorgeous new designer series paper - its called the Birthday Bouquet DSP and I LOVE it. I've used a whole pack up already. I found once I had started using it, it was very hard to stop!

I made these shopping lists and note pads as Christmas gifts. I love these spring colours so I used Blushing Bride cardstock and Pool Party cardstock to coordinate.
I used my favourite dies, the Butterflies Thinlit Dies and the Bold Butterfly Framelit Dies for the centre piece of each item of stationery. As you can see, the butterflies have 2 layers, the bottom layer is cardstock and the top layer is vellum.

Come back on Thursday 8th at 6pm to see more stationery made with this Designer Paper. I took this idea a few steps further and created a giftable stationery set based on the same design.
Why Thursday and why 6pm? Well, this Thursday the Pinkies are holding their Spring Summer Blog Hop and we will be showcasing projects made with new products from the Spring Summer catalogue.
If you don't know what a Blog Hop is, then make sure you stop by! If you can't wait until then, you can click here to see previous Pinkies Blog Hops.
If you don't know what a Blog Hop is, then make sure you stop by! If you can't wait until then, you can click here to see previous Pinkies Blog Hops.


I just wanted to take this opportunity to say hello to all of my subscribers, new and old - whether you follow my blog through being a direct subscriber or through Bloglovin', Facebook, Twitter, Pinterest or Google+. If you are not a subscriber, it would make my day if you followed my blog - click here to receive email updates each time I post a new project or click on one of the following: Bloglovin',
Facebook, Twitter, Pinterest or Google+ if you want to follow me through these social media channels.
Some of my more recent subscribers may have come across my website from receiving a thank you note and free gift when buying retired Stampin' Up! products from me on eBay. If that's you - thank you and welcome!!
Everyone who bought a product from my online shop on eBay in the month of September received a version of the featured paper bag and thank you note and also a free gift containing at least 8 sheets of 6"x 6" DSP and some ribbon.
I love to share what I make so I thought it would be a good idea to provide all of my details and a little bit of information about Stampin' Up! and how to place an order on the note card inside the paper bag.
Thanks again to all of you who got in touch to let me know how much you liked my blog, how you liked by photos on eBay and how you were pleased with your free gift. You have no idea how much that meant to me. I hope that you enjoy looking at my projects and that they inspire you to craft and have fun!

Subscribe to:
Posts (Atom)


Social Icons