
Showing posts with label Washi Label Punch. Show all posts
Showing posts with label Washi Label Punch. Show all posts


Happy Mothers day! I hope you are having a lovely day either being spoilt or just putting your feet up. I am sat on the sofa watching a film while my husband is at work. Both my little cats are with me - bliss!
My Mum has just called to say she just received her flowers, I hope she likes them and the card I sent her!
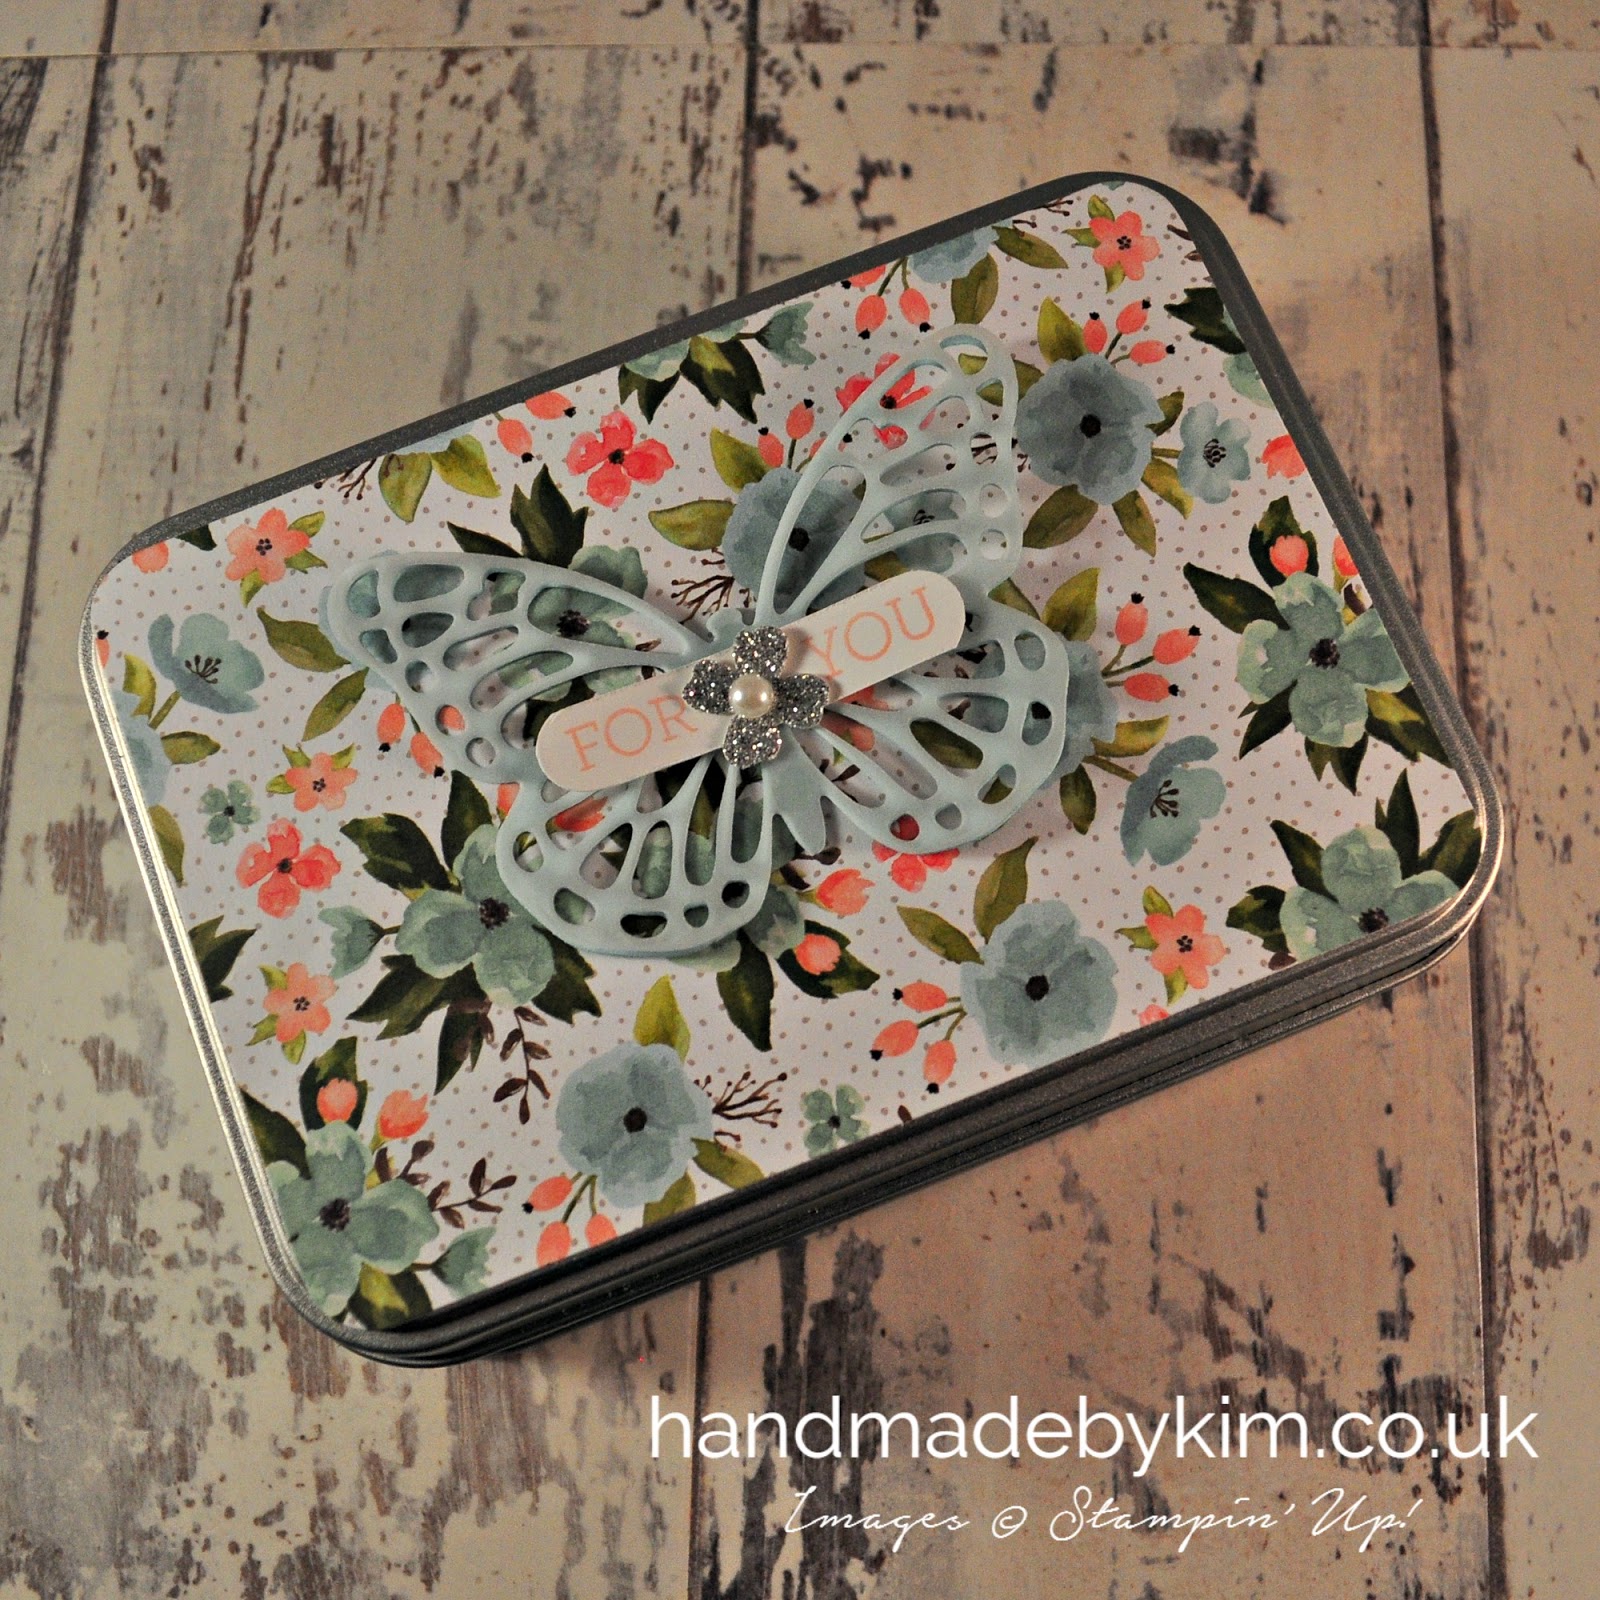
Last weekend I ran my very first workshop and it was such fun! The theme was mothers day and we had 6 hours to make a matching collection of gifts - a card in a box, a bag in a box (which included the small tin that fit perfectly inside) and large tin.
I gave the four ladies Abi, Aimee, Kelly & Laura a choice of 2 designer series papers - Timeless Elegance or Birthday Bouquet. Abi and Aimee chose Birthday Bouquet and Kelly & Laura chose Timeless Elegance.
I like to give a choice as we all have different preferences. My personal favourite is Timeless Elegance but the Birthday Bouquet paper has really given me a chance to work with such pretty colours over the last few months, I shall be sad to see this one go (if you really like it but haven't ordered it yet, you've only got just over 2 months to order it!)

I ended up changing the design of the Birthday Bouquet card in a box at the last minute, instead of a Blushing Bride layer, I changed it to Pool Party and instead of the pink striped pattern of DSP on the bottom level, I changed it to the flowers, I feel this works so much better now.

I gave all four ladies packs containing all of the DSP and cardstock needed and also gave some options for them to change the colours of the flowers etc so they could make it their own. My version below uses Very Vanilla and Basic Black for the flowers, but Laura chose to use Sahara Sand instead of Very Vanilla and I think it worked just as well.

The bag in a box was fun to make. I prepped all of the cardstock so all we had to do was assemble it. It really is so easy, if you haven't made one yet, you must give it a go (click here to watch my friend Caroline Hallet's YouTube video on how to make it)

At the time I made my samples, I had run out of the lovely flowers so I had to use the ice cream cones paper, we didn't use this one on the day but the paper is so cute!
The little tin fits perfectly in the bag in a box and is perfectly for holding a piece of jewellery or gift card.

We also had time to make the large tin. This could be used for so many things. My friend Aimee discovered that it holds two hotel chocolate slabs perfectly - amazing! What is better than receiving a handmade designed tin of chocolates?

The tin is also the perfect size to include some small handmade cards, there are so many options on what you can do with it!
It was so much fun preparing for the workshop and setting up the room. I wanted it to be perfect and set up a table each so we had enough space plus a big shot station.

Each person had a thank you gift bag and card, a sheet of grid paper, a pack of supplies, the metal tins and a brown bag to take everything home in.
I had enough equipment for each pair to share a trimmer and scoreboard, plus I put together a toolkit together for each pair to share.
Aimee brought along her die cutting machine so we could double the amount of flowers cut with this and also using the big shot.

Here is everyone cutting their flowers using the Big Shot. I showed them the plastic bag technique (click here to watch my friend Smiley's youtube video on this) and also using the new Big Shot Die Brush, both techniques are amazing and absolutley essential when cutting large amounts of flowers or intricate dies.

Everyone did an amazing job with the projects - especially as it was Abi's, Kelly's and Laura's first time crafting.
This is what Abi made. I love how she has added a glitter butterfly to the card in a box and how she changed up the butterflies on both tins and the bag in a box. The pearls are simply stunning too and look great in the brads on the bag in a box.

Here is what Laura made. I really like how Laura used Sahara Sand instead of Very Vanilla. I also love her two layer butterflies she made with the Elegant Butterfly punch. The bottom later was cardstock ad the top layer was glimmer paper and some others were the opposite. I will be using this idea myself for sure!

Aimee has recently joined my team and is already in love with the products. I love how she has curled her butterflies on the large tin in the opposite direction to what I did and how she used the reverse side of the DSP on the bottom layer of the card in a box and also for the tins.

Kelly did a great job too, I am just sorry I didn't get a better picture. I love how she has placed two butterflies together on the small tin, its something I never would have thought of doing and it looks so great.

I hope you've enjoyed me sharing my first workshop with you today. I had such a great time and it was a pleasure seeing how well Abi, Aimee, Kelly and Laura did in completing these complex projects and making it their own.
Come back on Friday to see the thank you cards, thank you gift bags and tool kits in more detail!
Remember, if you would like to receive the tutorial on how to make the card in a box, please sign up to my newsletter. You can sign up in the side bar on the right hand side under "subscribe for exclusive content". If you receive my blog updates by email you will still need to sign up as I can't automatically add you without your permission.

Timeless Elegance version
Built for Free Using: My Stampin Blog
Birthday Bouquet version
Built for Free Using: My Stampin Blog


I hope you and your family had a lovely Christmas and are looking forward to 2016 and all that it brings.
Myself and my husband had a quiet Christmas at home this year. We started off with an amazing meal at Marco Pierre White Steakhouse Bar & Grill in Congresbury near Bristol on Christmas Eve. The food was amazing, for a special treat and a truly memorable meal, we decided to share a Chateaubriand, essentially a large fillet of beef, intended to be shared and never for just one. This dish came with the most amazing onion rings, a grilled tomato and a small copper pan of triple cooked chips. A little jug of Bearnaise Sauce was the perfect accompaniment.
We opted out of starters so we could make sure we finish this beautiful steak and still have room for dessert - but we couldn't resist the warm basket of beautifully baked sourdough bread. For dessert I had a very sticky toffee pudding and Phil had a raspberry knickerbocker glory. It was a lovely relaxing evening with stunning food. The service was excellent and the waitress very kindly offered to take a photo of us.

Whilst I did miss hostessing, it was also lovely to put my feet up and relax and cook Christmas dinner at my own leisure. I cooked roast turkey and all the trimmings - my all-time favourite roast is rib of beef but my husband always says "its not Christmas if you don't have turkey", so turkey it was and it will always be. I'm not the biggest fan of turkey so I always make Jamie Oliver's Get Ahead Chrismas Gravy to serve with the meat, trust me, it makes all the difference to the meal and is well worth the effort to make it.
As we were spending Christmas apart from family, I wanted to make something handmade to give as presents. I made 6 of these little hampers, containing little treats to eat and drink and I really hope everyone liked them and found a little something inside that they really enjoyed. Naturally I couldn't post pictures of these until after Christmas, so here is my version of a Handmade Christmas Hamper and the little treats included within it.

These biscuits are so yummy, they are Sainsbury's Taste the Difference Belgian Milk Chocolate Shortbread Wreaths. I am glad I bought them when I did as they were sold out in no time. I packaged 2 biscuits in 4" x 6" cellophane bags to include in the hamper.
I made a label using the Lots of Labels Framelits and some kraft cardstock. I then stamped 'Chocolate Shortbread' using the Alphabet Rotary Stamp and underneath stamped the winter scene using the Cozy Christmas stamp set. I added a white star punched from Dazzling Diamonds Glimmer Paper and also coloured in the snow on the roof with a Wink of Stella glitter pen which will be available in the new Spring Summer catalogue. I stapled the label to the cellophane bag using the Handheld Stapler.

Here is another favourite of mine - Sainsbury's All Butter Fudge. It's very crumbly fudge and at £1.25 for 200g it's an absolute bargain. I put 4 little pieces of fudge into a 3" x 5" cellophane bag. The label is Kraft cardstock punched out with the Decorative Label Punch. Again, I used the Alphabet Rotary Stamp to stamp the word 'Fudge' and then added the sentiment 'Happy Winter' from the Happy Scenes stamp set. The little bird has been stamped using the Festival of Trees stamp set. I used the handheld stapler again to fix the label to the cellophane bag.

A hamper wouldn't be a hamper without some good old English tea so I ordered individually wrapped Twinings English Breakfast tea bags from eBay.
I made these cute tea bag holders using some 6" x 6" Designer Series Paper and added a sentiment using the Washi Label Punch and stamped 'Season's Greetings' using the Happy Scenes stamp set.
I used a video tutorial I found on YouTube by Joan Robertson to make the tea bag holder - click here to watch it, it's so easy and quick to make and each one holds two tea bags.

I got the clip lid glass jars from Sainsburys for £1.25 each - unfortunately I can't find them online but they are similar to the Kilner Spice Jars. They are perfect as once the hot chocolate has been used up, the glass jars can be reused in either the kitchen, or even in the craft room.
I used the Alphabet Rotary Stamp to stamp 'Hot Chocolate' onto some Kraft cardstock. I then punched out little tags using the Washi Label Punch. A star punched from Gold Glimmer Paper punched using one of the Itty Bitty Accents punches and fixed to the tag with a glue dot is I needed to finish off the jar. To fix the label to the jar, I punched a small hole using the 1/8" Circle Handheld Punch and threaded through some Linen Thread before tying the label onto the glass jar.

I couldn't forget the coffee drinkers so I bundled together a sachet of Nescafe Latte and Nescafe Cappuccino together with some Burlap ribbon, a Snowflake Wooden Element and some Silver Cord - I really love this!
The final items I included in the hamper weren't decorated - three mini Tiptree jars of Marmalade, Raspberry Jam and Honey. I also threw in a super cute mini jar of Nutella. They are really expensive on Amazon, but I managed to get these from the Airport in Sharm El Sheikh for a much cheaper price. Finally, I inlcuded a pack of shortbread fingers that I love and here you have it, my Handmade Christmas Hamper.
The basket I've used is the Small My Style Vintage White Storage Basket for £1.99. You can pick these up in lots of different shops. What I love about this hamper is that when you have taken everything out, you are left with a very useful storage basket to use! I love these baskets and I use these in all shapes and sizes to try and organise myself in my craft room.
Thank you for reading my blog post today. Enjoy the rest of the bank holiday, I'll be back soon with some projects made with new products from the Spring Summer Catalogue. I can't wait to show you a notebook set I've made!
Subscribe to:
Posts (Atom)


Social Icons