
Showing posts with label Foil Sheet. Show all posts
Showing posts with label Foil Sheet. Show all posts

Happy Birthday card using A Little Foxy Designer Series Paper
Tuesday, November 29, 2016 Somerset, UK

I made this card for a friend of mine Sasha, who is also a Stampin' Up! Demonstrator. It was her birthday earlier this month and I wanted to send her a surprise. Sasha has a blog too so please go and check it out by clicking here.

The paper is just so cute I had to use it again. I never feel pressure to over embellish a card and this is one of those simple cards that I like to make.
My last project used the same Designer Series Paper and also featured the colour grey - if you missed it, take a look at it by clicking here. Its interesting to see how different colours paired with grey look so different. Grey is very versatile and I have been meaning for ages to try it with yellow. I love this version which uses two greys - Basic Gray, Smokey Slate and Pool Party.

That's it from me today. I hope to be back in the next week or two. Unfortunately I have WiFi issues at home so I am blogging from work on my lunch break today.

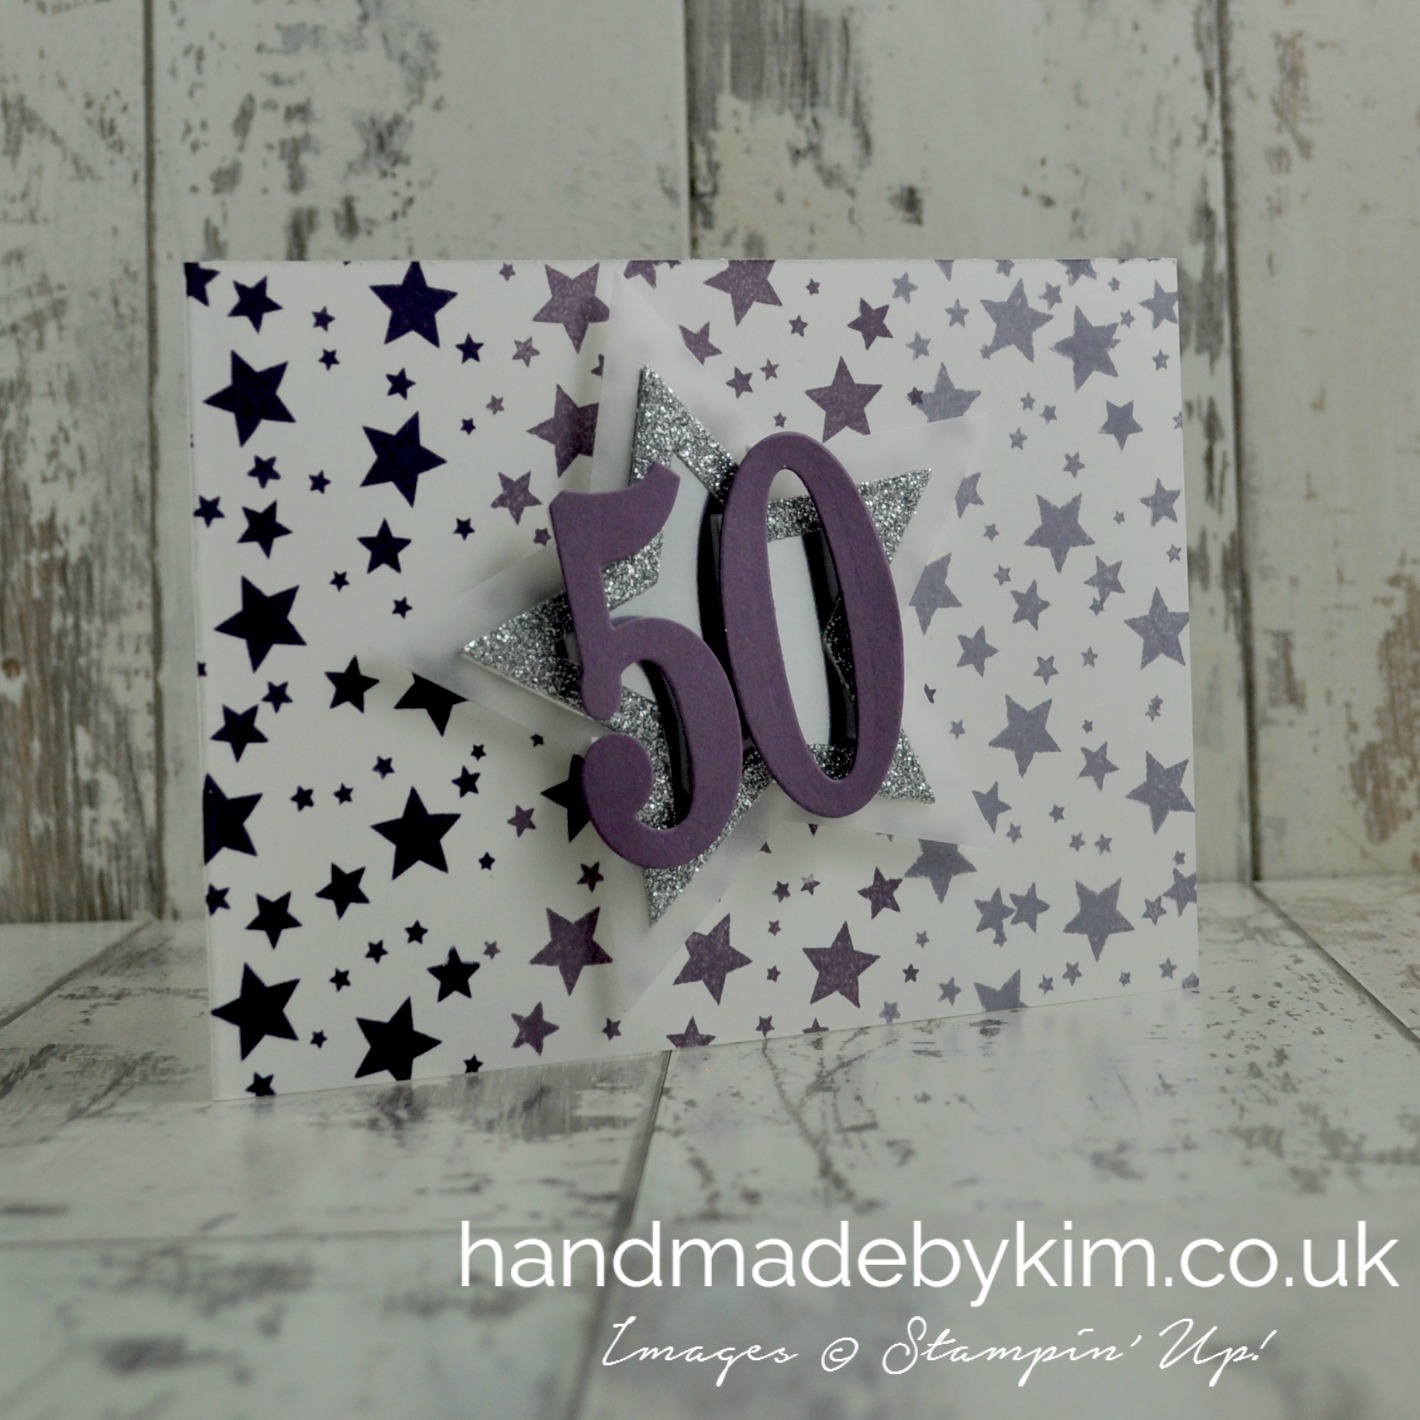
Just a quick card from me today. I made this card for a friend of mine called Bhavana (aka Baz) who turned 50 a few weeks ago.
Baz is a fellow Stampin' Up! demonstrator and part of the Pinkies team I belong to so I just had to make her a hand stamped handmade card. I hope she had a lovely week of celebrations!
I wanted to stamp my own background using the stars from the Perpetual Birthday Calendar stamp set and after several attempts I decided on this sideways ombre effect using Elegant Eggplant, Perfect Plum & Wisteria Wonder. I love this effect and can't wait to use it again!
I then die cut stars in Vellum, Silver Glimmer Paper and Silver Foil Sheet and layered them together before add the number 50 die cut from Perfect Plum cardstock using the Large Numbers Framelit Dies. I popped this up using Stampin' Dimensions, stamped Happy Birthday inside the card and my card was finished. I really hope Baz liked it!


Pinkies Stampin' Up! 2016 Sale-a-Bration Blog Hop feat. Botanicals For You Stamp Set
Thursday, January 28, 2016

Thank you for joining us on another Pinkies Blog Hop! We're showcasing lots of gorgeous projects using new Stampin' Up!® products that you can earn free during Sale-a-Bration. Simply use the buttons at the end of each post to keep hopping!
If you have arrived here from Jan's blog, thanks for stopping by! I really hope you enjoy looking at the projects we have made!

For today's project I've used the Botanicals For You stamp set that you can earn for free during Sale-a-Bration for every £45 you spend. This large sentiment is perfect for embossing and featuring as the centre piece of the card. I made a similar version of this card a few weeks ago and I promised a stepped up version of this card - and here it is!
To step it up, I added an additional layer using a Silver Foil and also added a background using the Watercolour Wash Stamp Set and Soft Sky ink.
I also stamped the flowers onto Vellum using Versamark Ink and Silver Stampin' Emboss Powder before punching them out with the Itty Bitty Accents flower punch.
As in my previous version, I added a Rhinestone to the centre of each flower but to step it up, you can just about see either side of the flowers are some silver embosssed leaves.

I made another version of this card and used Gold Stampin' Emboss Powder instead of Silver, Sahara Sand Ink instead of Soft Sky and Pearls instead of Rhinestones inside the flowers.
Which is your favourite?

I decorated the inside of these cards using the sentiment On Your Special Day, perfect for many different occasions - engagements, marriages, anniversaries, special birthdays and more.
I stamped the sentiment and leaves using Versamark Ink and Emboss Powder onto Shimmery White Cardstock. I then added 3 more flowers, to match the front of the card. I layered this onto a Foil Sheet and adhered it to the centre of the inside using Tear & Tape Adhesive.

I love Sale-a-Bration! Did you know that Stampin' Up! run Sale-a-Bration every year from the beginning of January until the end of March. During this time you can choose one product from the Sale-a-Bration catalogue for every £45 you spend. And if you spend over £200, you can choose £20 of products in addition to the 10% of Stampin' Rewards you would receive. There are 7 stamp sets, 3 paper packs and a Project Life card collection to choose from.
Its also the best time of year to join Stampin' Up! as a demonstrator as you will receive an extra £30 of products in your starter kit. You still pay £99 but instead of choosing £130 products, you can choose £160 - how great is that? If you don't want to be a demonstrator, that's okay, you can still sign up to receive discount on all of the products you purchase, be one of the first to see new catalogues and attend exclusive events. Want to find out more, let me know!
I hope you've enjoyed today's Blog Hop! Have you chosen which free product you are going to choose when you next order?
Click Next to see lovely Michelle's blog and the gorgeous project she has made using free Sale-a-Bration products.


Soft Sky & Silver Version
Sahara Sand & Gold Version


Its a bit of a last minute entry for me this week in the Global Design Project #GDP019. This weeks theme is Love and this is what I've come up with. I've used the new Rose Garden Thinlit Dies and the Hello You Thinlit Dies.
Head on over to the Global Design Project website by clicking here to see all of the other entries! There are almost 100 entries so far!
And make sure you don't miss the next Pinkies Blog Hop. Its starting at 6pm GMT this Thursday. Click here to subscribe to my blog so you can see what we've all made using free Sale-a-Bration products.


And make sure you don't miss the next Pinkies Blog Hop. Its starting at 6pm GMT this Thursday. Click here to subscribe to my blog so you can see what we've all made using free Sale-a-Bration products.


When The Red, Red Robin Comes Bob, Bob Bobbin' Along - Handmade Christmas Card using Stampin' Up! products
Monday, December 14, 2015

Oh my gosh, where have the last few weeks gone? To say we've been busy is an understatement. With less than 2 weeks until Christmas now the pressure is on to get the presents wrapped and cards made (yes, I'm still making my Christmas cards). I haven't even got any decorations up yet.
Normally by now, I would have everything well under control but this year hasn't quite gone to plan. With a late holiday in October, complete redecoration of our living room (floors, walls, furniture, lighting....) and some heartbreaking anxiety issues with one of my little cats, Christmas has not been my top priority, even though its one of my favourite times of the year. Thankfully, everything is coming together now and fingers crossed, our beautiful cat Bayley seems to be improving. My husband and I are certainly looking forward to a nice break at home together with the cats as we both have 5 days off work!

I made this card a few weeks ago. Its another version using the Hearth & Home framelits but with a totally different look to what you've seen already. I used some DSP from the Home for Christmas Designer Series Paper. To get an aged look, I spritzed the DSP with water and scrunched in into a ball to break the paper fibres down. I then stretched the paper back out and left it to dry. Once it was dry, I mounted the DSP onto a layer of Gold Foil and a base of Lost Lagoon cardstock. I stamped the window scene onto some Very Vanilla cardstock and simply coloured in the birds with my Real Red Stampin' Write Marker to look like red robins. I cut the window from Kraft Corrugated Paper and added a wooden Snowflake Elements and the sentiment Peace in Gold Glimmer paper. Peace is certainly want this Christmas, peace at home and peace in the world.

Built for Free Using: My Stampin Blog

Winter Wonderland Christmas Shaker Card using Happy Hearth Thinlit Dies by Stampin' Up! - part 2
Thursday, November 26, 2015

Well I've been working flat out for 4 days helping my Dad and my Husband lay laminate flooring in our living room and dining room. Its been challenging, frustrating and eventful but the end result is just fabulous and it was certainly worth all the hard work, aches and pains.
It was quite funny actually, my card making skills really came into play over these few days. To name a few, I was able to contribute with the measuring, resolving problems and patching up mistakes!
Having mastered laying underlay I was quite disappointed to find that sawing was a skill that I would never get the hang of.
Also, after laying all the flooring trim, I have discovered that No More Nails is not my friend. I really wish they could make Tombow for DIY as I have total control of that adhesive and very little with the No More Nails!

Anyway, enough about me, on Saturday I promised to post my other version of the Winter Wonderland Christmas Shaker Card on Wednesday but unfortunately time completely slipped away from me - please accept my apologies!
So without further ado, here is my second version of the Winter Wonderland Christmas Shaker Card.
I have used Gold Foil instead of Silver Foil and I also used the very cool, on trend antlers print from the Winter Wonderland Specialty DSP. Its so striking, I would love wrapping paper in this design!

If you didn't catch my other card I made using the same sketch and window scene, please click here to take a look at the other version where I've used Blackberry Bliss cardstock instead of Basic Black.

Can you believe its a month until Christmas? If you've got an order to place, please let me know ASAP so we can get the order placed and delivered by Christmas for you. I hope you enjoyed this project today and I hope to hear from you soon.

Winter Wonderland Christmas Shaker Card using Happy Hearth Thinlit Dies by Stampin' Up! - part 1
Saturday, November 21, 2015

I really like the Hearth and Home Thinlit Dies and wanted to make another Christmas Card using the window die. I was also thinking about making a shaker card for the first time. I couldn't decide which to make first so I thought I would have a go combining the two designs together. I love the result. What do you think?

I attached a piece of Window Sheet to the back of the die cut window. I then had a look through my stash of adhesives and managed to find some old foam tape. I added two layers of the foam tape (to give it enough depth) around the edge of the window and then put some sequins inside. I then attached a piece of Whisper White cardstock which I had stamped with the trees background from the Happy Scenes stamp set to the back, before adhering it to my card base.

I love this effect so I recreated it with some different patterned DSP and cardstock. Come back on Wednesday to see the other version I've created.
Thanks for stopping by. I've got some Autumn/Winter catalogues left, if you would like me to post one to you please get in touch using the social media icons on the right hand side.


I just wanted to take this opportunity to say hello to all of my subscribers, new and old - whether you follow my blog through being a direct subscriber or through Bloglovin', Facebook, Twitter, Pinterest or Google+. If you are not a subscriber, it would make my day if you followed my blog - click here to receive email updates each time I post a new project or click on one of the following: Bloglovin',
Facebook, Twitter, Pinterest or Google+ if you want to follow me through these social media channels.
Some of my more recent subscribers may have come across my website from receiving a thank you note and free gift when buying retired Stampin' Up! products from me on eBay. If that's you - thank you and welcome!!
Everyone who bought a product from my online shop on eBay in the month of September received a version of the featured paper bag and thank you note and also a free gift containing at least 8 sheets of 6"x 6" DSP and some ribbon.
I love to share what I make so I thought it would be a good idea to provide all of my details and a little bit of information about Stampin' Up! and how to place an order on the note card inside the paper bag.
Thanks again to all of you who got in touch to let me know how much you liked my blog, how you liked by photos on eBay and how you were pleased with your free gift. You have no idea how much that meant to me. I hope that you enjoy looking at my projects and that they inspire you to craft and have fun!

Butterflies & Stripes - Handmade cards using the Floral Wings stamp set by Stampin' Up!
Monday, October 12, 2015

I had such a lovely time at our Quarterly Training yesterday. We made 5 amazing projects and I can't wait to take the inspiration I've gained from today and make some brand new projects.
I had to take some sample of work I had created so I took these cards and lots of other projects that are going to feature on my blog over the next few weeks,

I love the stripey paper in the DSP stacks. On this occasion, I didn't want to show a border of the cardstock underneath. I really like this effect so I might try it with some other DSP to see how it looks.

We're not all perfect (although I would like to be!) Sometimes things just don't go to plan. For example, on the card above my butterfly is not positioned in the centre. I didn't notice it at the time so when I did notice it, I was tempted to make the card from scratch again.

I hope you enjoyed my project today. Come back on Wednesday to see the Christmas Gift Box I've made.


I hope everyone is having a lovely Valentines Day!
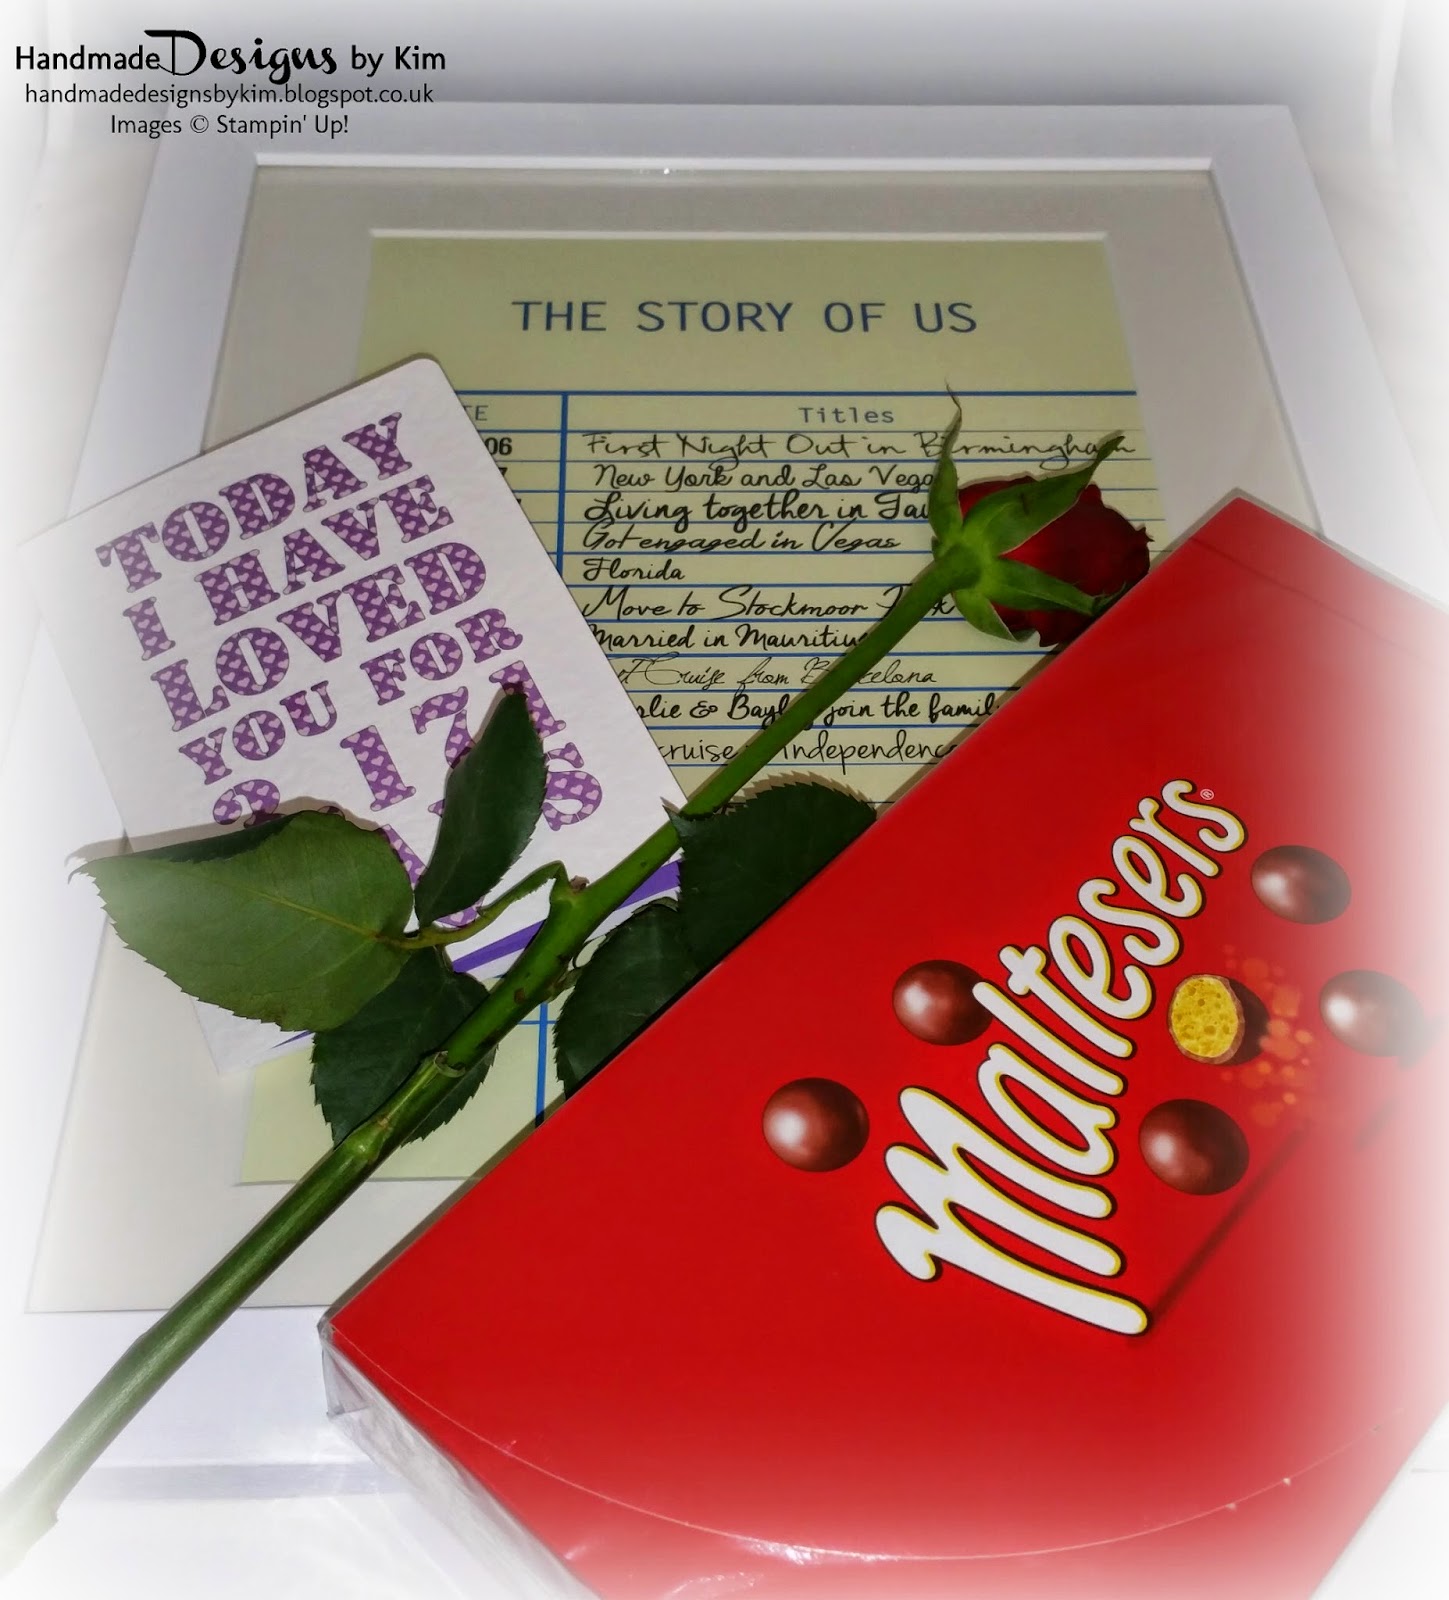
My husband surprised me with some lovely presents, I am very thankful to have such a thoughtful husband. I received a lovely personalised frame noting all of the key dates since we got together, a red rose and a box of Malteasers.
Here are the presents that I gave to my husband. A handmade Valentines card using techniques I have never used before and a handmade Valentines gift bag which contained a wooden star and also 2 heart cookies which I bought from Not on the High Street.

I used the Stacked With Love Designer Series Paper Stack to decorate the front of the card and used the Hello You Thinlits die to add 'Happy' to the front of the card along with 'Valentine's Day' which I stamped in Versamark Ink and covered Silver Stampin' Emboss Powder. I then set the Embossing powder my with my heat gun and punched it out with the Word Window Punch. You can find a similar stamp in the Teeny Tiny Sentiments stamp set.
 I got the idea for the inside of this card from watching my upline, Michelle Lasts Youtube video tutorials. It's difficult to see in the photo below that this card is actually 3D when opened. The photo to the right shows you that the base of the card has two layers. The card folds flat when the card is closed (it's so clever!) Click here to see Michelle's video tutorial on how to make this 3D card.
I cut out the heart using the heart die from the Mini Treat Bag Thinlits set and at the same time created the embossed border. The technique is really straight forward. Click here to watch Michelle's tutorial on how to make the embossed border.
I used the Real Red Brights Designer Series Paper which was left over from the Valentines Gift Bag in my previous post to line the first layer. This is so that you see the lovely paper where you have cut out the heart shape.

I hope you have enjoyed seeing my projects today. Have a great weekend! and if you want to order any of these products, please go to my online shop by clicking on the pictures below.
Subscribe to:
Posts (Atom)


Social Icons