
Showing posts with label Timeless Elegance DSP. Show all posts
Showing posts with label Timeless Elegance DSP. Show all posts


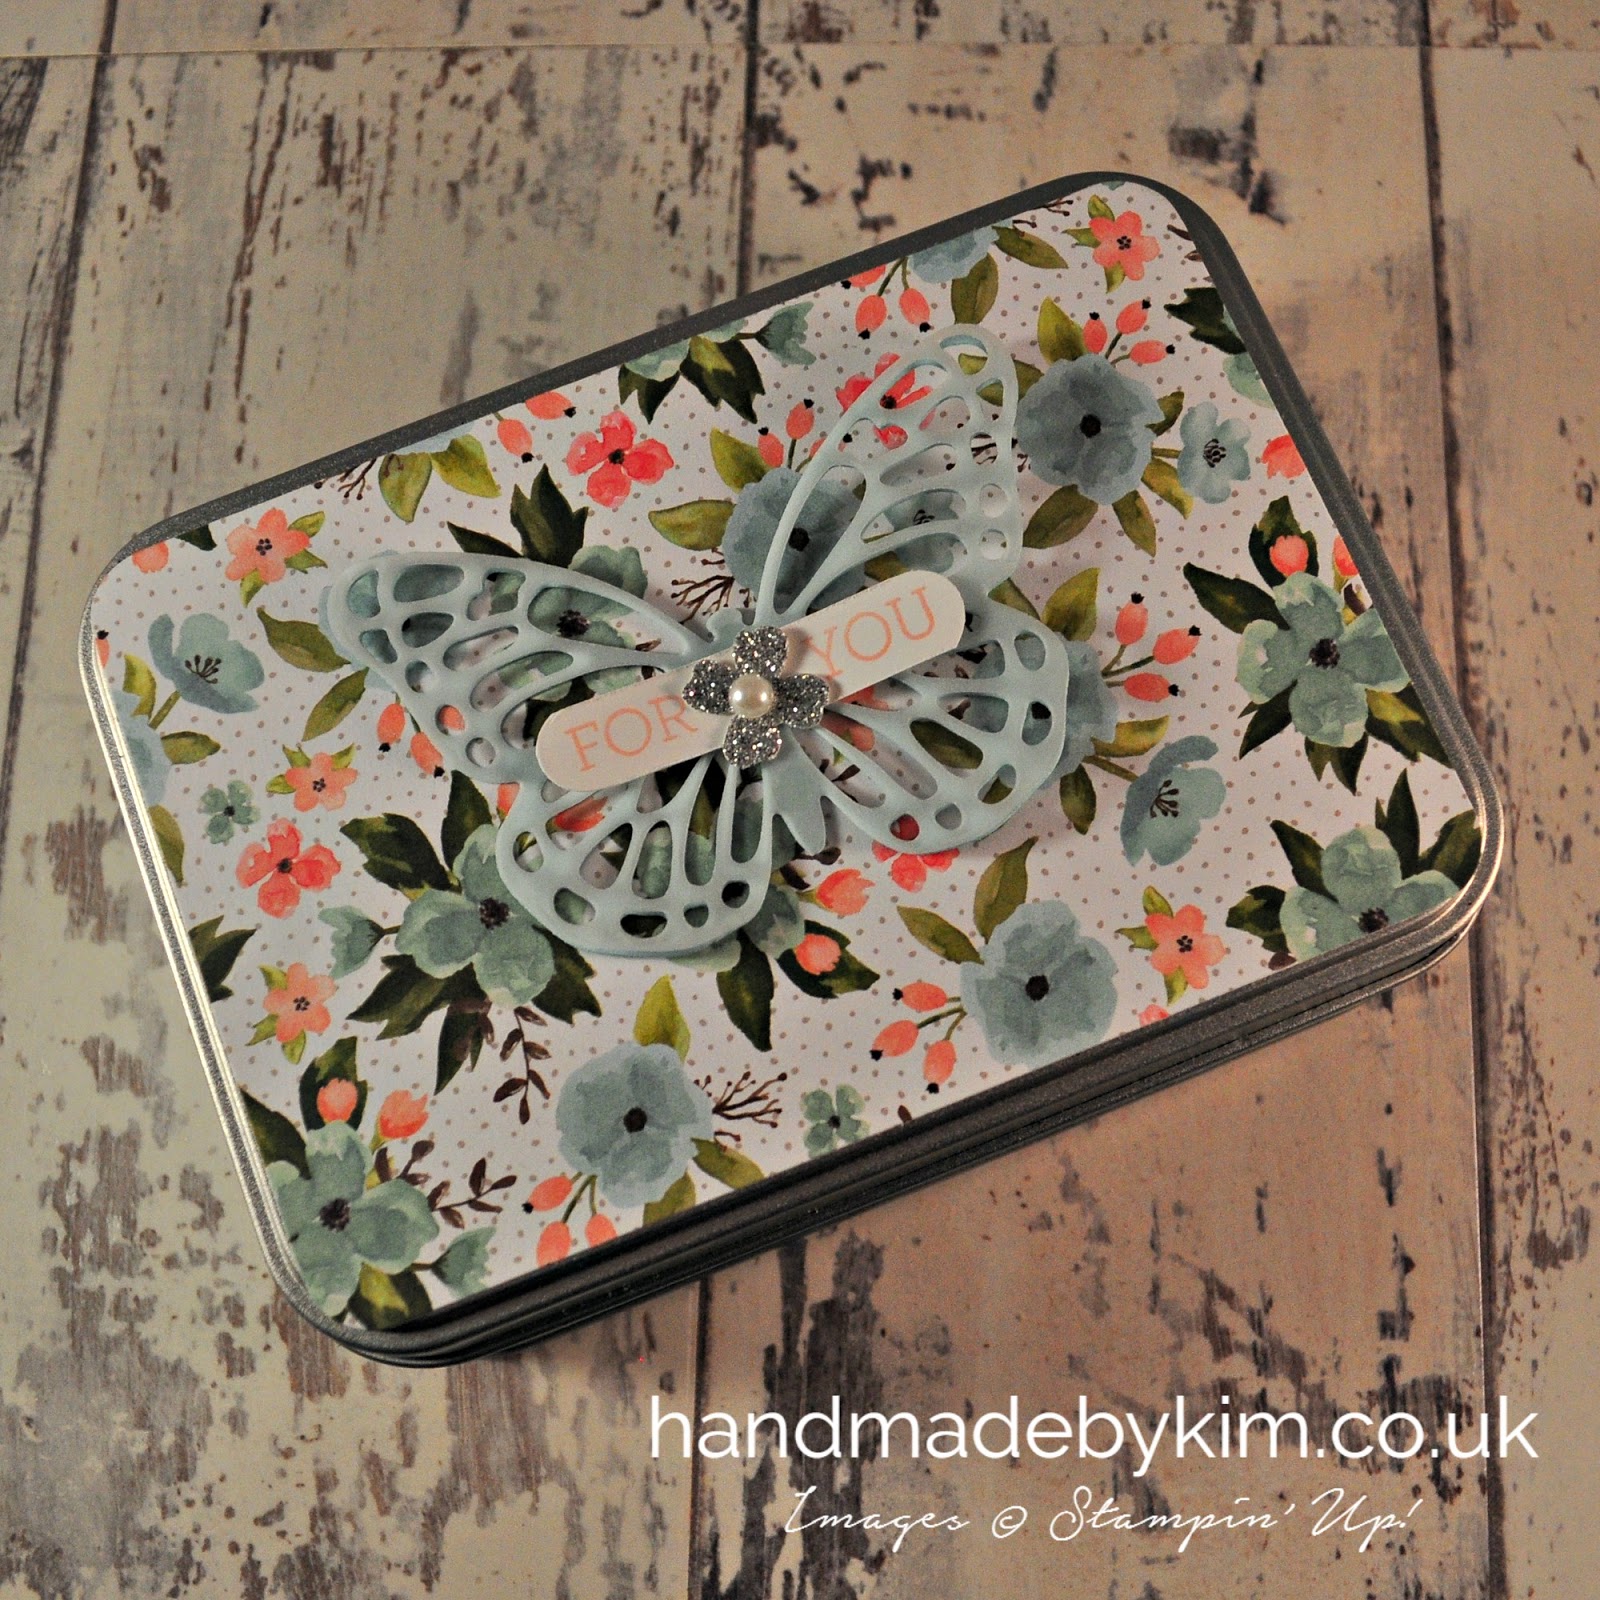
Just a quick post from me today to show you these lovely cards I made, inspired by a card I saw on Pinterest.

The paper I've used is from the retired Timeless Elegance DSP. I love this paper but unfortunately its now completley sold out. Thankfully I've got lots left over!

I've used the Botanicals Builder Framelit Dies for the flowers and added the sentiment from the retiring Expressions Natural Elements (I'm really going to miss these!)

Thanks for stopping by and a big hello to all my new subscribers! Over the next week or two I will be saying goodbye to my favourite DSP that's retiring from the 2015-16 Annual Catalogue and Spring Summer Catalogue using one very simple card design.
I cannot wait to start showing you fresh new projects that I will create using brand new products from the forthcoming Annual Catalogue that's being released on 1st June 2016.


Stampin' Up! held their UK event called Onstage Local in Telford at the weekend, over 380 demos attended and it was truly an amazing day! We got to see the new catalogue and get an idea of what products were retiring. To see the retirement list, scroll down to the end of this post.
If you are a new follower or a new crafter, let me tell you all about what swaps are. Swaps are hand crafted card fronts or 3D items that you make multiples of to swap with others. The objective for this event was to use current product and showcase these in a design that others can use as inspiration or as samples to show to customers or take to events. At the same time you get to meet and mingle with lots of demos. Its such fun but its not compulsory! You get exactly what you put in, so if you make 100 swaps, you will come home with 100 swaps.
On the Friday before Onstage I attended an event in a hotel that was arranged by my upline Michelle Last. It was a lovely afternoon crafting, playing games and catching up with old friends and making new ones. For this event I made 25 of these swaps, one for all 24 demos attending and 1 for me to keep.

Most of the products I have used in this project are now retiring and I will be very sad to see the Timeless Elegance DSP go.... BUT I knew that would happen as all DSP retires every year. I know I have used it in my of my projects lately, one reason was to use up what I had left but the other reason was simply because I love it so much.
I'm actually quite excited to use the new DSP coming out and come up with some new designs! I am sure you will like to see something new from me too!

I really hope everyone liked my swaps. When I got home after a long drive on Saturday evening, I spent an hour looking through the swaps I received. My husband was after the chocolate that was contained in some of them but I am leaving them where they are at the moment as I am thinking of doing my first Youtube video to show all the swaps I received over the two events. Would you like to see them? Scroll down and leave a comment if you would like to see the swaps I received.

In this photo I've tried to capture the glitter effect of the butterfly and sentiment but as usual its so hard to capture in a photograph. You can just about see the glitter on the butterfly in this photo. To achieve this look I have used the Wink of Stella glitter pen in clear on the Sahara Sand cardstock after I die cut the butterfly. For the sentiment I used my brayer to stain the wooden sentiment with Basic Black Archival Ink, allowed it to dry and then added glitter, again using the Wink of Stella glitter pen in clear. The whole effect is very sparkly. I also added glitter to the edges of the cardstock, for this I used the Wink of Stella Glitter pen in gold around the edge of the Basic Black cardstock


The retiring products from the 2015-16 Annual Catalogue and Spring Summer Catalogue are now live and showing in my online shop!
Every year products are retired in order to make way for brand new shiny products. I will be selling my retired products in June so if you are interested in seeing what I've got, please leave a comment or subscribe to my blog.
Now, if I could give you once piece of advice, it would be to have a look through the retiring items straight away and place an order for anything that you have had on your wishlist. Its important you do this as soon as you can as they can sell out very quickly and they are not manufacturing anymore of these items.
Last year I was going to order some transfer (adhesive) sheets and I waited a day and they were gone. Needless to say I have used the sheets I had left over very sparingly and when I run out I will be very sad as they are fab to use with intricate die cuts.
To go to my online shop and view the products click here, or click on one of the buttons below.


If you have any questions about the retiring list or how I made these swaps, leave me a comment or contact me directly using the social media icons.
Stampin' Up! held their UK event called Onstage Local in Telford at the weekend, over 380 demos attended and it was truly an amazing day! We got to see the new catalogue and get an idea of what products were retiring. To see the retirement list, scroll down to the end of this post.
If you are a new follower or a new crafter, let me tell you all about what swaps are. Swaps are hand crafted card fronts or 3D items that you make multiples of to swap with others. The objective for this event was to use current product and showcase these in a design that others can use as inspiration or as samples to show to customers or take to events. At the same time you get to meet and mingle with lots of demos. Its such fun but its not compulsory! You get exactly what you put in, so if you make 100 swaps, you will come home with 100 swaps.
On the Friday before Onstage I attended an event in a hotel that was arranged by my upline Michelle Last. It was a lovely afternoon crafting, playing games and catching up with old friends and making new ones. For this event I made 25 of these swaps, one for all 24 demos attending and 1 for me to keep.
Most of the products I have used in this project are now retiring and I will be very sad to see the Timeless Elegance DSP go.... BUT I knew that would happen as all DSP retires every year. I know I have used it in my of my projects lately, one reason was to use up what I had left but the other reason was simply because I love it so much.
I'm actually quite excited to use the new DSP coming out and come up with some new designs! I am sure you will like to see something new from me too!
I really hope everyone liked my swaps. When I got home after a long drive on Saturday evening, I spent an hour looking through the swaps I received. My husband was after the chocolate that was contained in some of them but I am leaving them where they are at the moment as I am thinking of doing my first Youtube video to show all the swaps I received over the two events. Would you like to see them? Scroll down and leave a comment if you would like to see the swaps I received.
In this photo I've tried to capture the glitter effect of the butterfly and sentiment but as usual its so hard to capture in a photograph. You can just about see the glitter on the butterfly in this photo. To achieve this look I have used the Wink of Stella glitter pen in clear on the Sahara Sand cardstock after I die cut the butterfly. For the sentiment I used my brayer to stain the wooden sentiment with Basic Black Archival Ink, allowed it to dry and then added glitter, again using the Wink of Stella glitter pen in clear. The whole effect is very sparkly. I also added glitter to the edges of the cardstock, for this I used the Wink of Stella Glitter pen in gold around the edge of the Basic Black cardstock
The retiring products from the 2015-16 Annual Catalogue and Spring Summer Catalogue are now live and showing in my online shop!
Every year products are retired in order to make way for brand new shiny products. I will be selling my retired products in June so if you are interested in seeing what I've got, please leave a comment or subscribe to my blog.
Now, if I could give you once piece of advice, it would be to have a look through the retiring items straight away and place an order for anything that you have had on your wishlist. Its important you do this as soon as you can as they can sell out very quickly and they are not manufacturing anymore of these items.
Last year I was going to order some transfer (adhesive) sheets and I waited a day and they were gone. Needless to say I have used the sheets I had left over very sparingly and when I run out I will be very sad as they are fab to use with intricate die cuts.
To go to my online shop and view the products click here, or click on one of the buttons below.
If you have any questions about the retiring list or how I made these swaps, leave me a comment or contact me directly using the social media icons.


If you are visiting for the first time, welcome to my blog!
Thank you so much for taking the time to have a look at the project I have made.
Today I am super excited to be taking part again in Kylie Bertucci's International Blog Highlight showcasing handmade cards made using Stampin' Up! products by demonstrators and customers from all over the world.

Kylie has challenged us to come up with a card made based on the theme "Love" so I chose to make this beautiful wedding card.
VOTE FOR ME
If you like my card please vote for me by clicking here.
Once you have clicked on the link, all you need to do to cast your vote is click on the heart in the top right corner of the photo - my card is featured under photo number 11.
The competition runs for 6 days so if you are planning on voting, please place your vote by Wednesday!

I love the wooden sentiment on the front of this card. In fact I have used this technique on the team swaps I am making for Onstage Local next week.
Its really glittery but unfortunately my photograph does not capture this.
I still wanted to tell you how I decorated the sentiment in case you wanted to give this a try. I sponged black ink over the sentiment and then added a layer of glitter using the clear Wink of Stella pen. Simple!
Its really glittery but unfortunately my photograph does not capture this.
I still wanted to tell you how I decorated the sentiment in case you wanted to give this a try. I sponged black ink over the sentiment and then added a layer of glitter using the clear Wink of Stella pen. Simple!

I also used the Wink of Stella pen on the inside of the card on the layer of black underneath the sentiment. You can just about see it sparkle in this photo.

GIVEAWAY!!!
In addition to entering this competition, I will be giving this card away after the voting has ended.
To be in for a chance to win this card, all you need to do is leave a comment on this blog.
I will send this card anywhere in the world as I will be picking the winner at random. Good luck!
I will send this card anywhere in the world as I will be picking the winner at random. Good luck!

You can buy all of the supplies I have used to make this card from Stampin' Up!
To visit my shop please select Shop Online at the very top of this page.
- Black Archival Ink - 140931 £6.50
- Neutrals Cardstock (I've used Basic Black & Sahara Sand) - 131283 £6.50
- Going Places Designer Series Paper - 140581 £7.50
- For The New Two Stamp Set. Clear Mount - 138562 £16.00. Wood Mount - 137147 £22.00
- Butterflies Thinlit Dies (3 Dies Included) - 137360 £22.00
- Sahara Sand Lace Trim - 137866 £6.50
- Wink of Stella (Clear) Glitter Pen - 141897 £7.25
- Expressions Natural Elements (15 pieces included) - 138395 £4.50


I'm back, its been a little quiet on the crafting front as I took a week off work to do DIY at home, unfortunately I've had a a bit of a severe reaction to some of the chemicals from either the paint, scotchguard or my new carpet and for the last week I've had a terrible rash on my face that I am now being treated for. I just hope it clears up soon as On Stage Local (the Stampin' Up! UK event) is on next Saturday 16th April and I'm going to be meeting up with lots of people. Anyway, positive thoughts, it WILL get better....

All the supplies I've used are by Stampin' Up!. If you want to order any of the products, please let me know. If you are wondering where I got the lace from, its the Sahara Sand Lace Trim. I've used a sponge and some Black Ink to change the colour to work with my design.
Please do leave a comment to let me know you stopped by! Also, check out the links on the left hand side where you can subscribe to receive my blog updates and also my newsletter.
Coming up over the next few weeks I have a great Wedding card to show you plus swaps and gifts I am making for On Stage Local in Telford. The excitement is setting in now, I can't wait to see the new catalogue and play with some of the products!


I'm playing along with the Global Design Project again this week with this brilliant sketch challenge designed by Teneale Williams.
Make sure you check out all of the designers amazing cards that are based on this sketch for challenge #GDP026. Keep checking back all week to see all of the amazing entries! Just click here to have a look!

I haven't had a chance to use the gold Wink of Stella glitter pen yet but I am so glad I picked it up today as I got this amazing effect on the butterfly die cut from Basic Black cardstock.
I also used my clear Wink of Stella Pen on some Vellum cardstock on the butterfly punched out with the Elegant Butterfly punch.
If you have been following my blog, you probably know that I love anything that sparkles. It just makes me happy, I can't explain why!
I hope you've enjoyed looking at my project today, please leave a comment to let me know you stopped by!


Happy Mothers day! I hope you are having a lovely day either being spoilt or just putting your feet up. I am sat on the sofa watching a film while my husband is at work. Both my little cats are with me - bliss!
My Mum has just called to say she just received her flowers, I hope she likes them and the card I sent her!
Last weekend I ran my very first workshop and it was such fun! The theme was mothers day and we had 6 hours to make a matching collection of gifts - a card in a box, a bag in a box (which included the small tin that fit perfectly inside) and large tin.
I gave the four ladies Abi, Aimee, Kelly & Laura a choice of 2 designer series papers - Timeless Elegance or Birthday Bouquet. Abi and Aimee chose Birthday Bouquet and Kelly & Laura chose Timeless Elegance.
I like to give a choice as we all have different preferences. My personal favourite is Timeless Elegance but the Birthday Bouquet paper has really given me a chance to work with such pretty colours over the last few months, I shall be sad to see this one go (if you really like it but haven't ordered it yet, you've only got just over 2 months to order it!)

I ended up changing the design of the Birthday Bouquet card in a box at the last minute, instead of a Blushing Bride layer, I changed it to Pool Party and instead of the pink striped pattern of DSP on the bottom level, I changed it to the flowers, I feel this works so much better now.

I gave all four ladies packs containing all of the DSP and cardstock needed and also gave some options for them to change the colours of the flowers etc so they could make it their own. My version below uses Very Vanilla and Basic Black for the flowers, but Laura chose to use Sahara Sand instead of Very Vanilla and I think it worked just as well.

The bag in a box was fun to make. I prepped all of the cardstock so all we had to do was assemble it. It really is so easy, if you haven't made one yet, you must give it a go (click here to watch my friend Caroline Hallet's YouTube video on how to make it)

At the time I made my samples, I had run out of the lovely flowers so I had to use the ice cream cones paper, we didn't use this one on the day but the paper is so cute!
The little tin fits perfectly in the bag in a box and is perfectly for holding a piece of jewellery or gift card.

We also had time to make the large tin. This could be used for so many things. My friend Aimee discovered that it holds two hotel chocolate slabs perfectly - amazing! What is better than receiving a handmade designed tin of chocolates?

The tin is also the perfect size to include some small handmade cards, there are so many options on what you can do with it!
It was so much fun preparing for the workshop and setting up the room. I wanted it to be perfect and set up a table each so we had enough space plus a big shot station.

Each person had a thank you gift bag and card, a sheet of grid paper, a pack of supplies, the metal tins and a brown bag to take everything home in.
I had enough equipment for each pair to share a trimmer and scoreboard, plus I put together a toolkit together for each pair to share.
Aimee brought along her die cutting machine so we could double the amount of flowers cut with this and also using the big shot.

Here is everyone cutting their flowers using the Big Shot. I showed them the plastic bag technique (click here to watch my friend Smiley's youtube video on this) and also using the new Big Shot Die Brush, both techniques are amazing and absolutley essential when cutting large amounts of flowers or intricate dies.

Everyone did an amazing job with the projects - especially as it was Abi's, Kelly's and Laura's first time crafting.
This is what Abi made. I love how she has added a glitter butterfly to the card in a box and how she changed up the butterflies on both tins and the bag in a box. The pearls are simply stunning too and look great in the brads on the bag in a box.

Here is what Laura made. I really like how Laura used Sahara Sand instead of Very Vanilla. I also love her two layer butterflies she made with the Elegant Butterfly punch. The bottom later was cardstock ad the top layer was glimmer paper and some others were the opposite. I will be using this idea myself for sure!

Aimee has recently joined my team and is already in love with the products. I love how she has curled her butterflies on the large tin in the opposite direction to what I did and how she used the reverse side of the DSP on the bottom layer of the card in a box and also for the tins.

Kelly did a great job too, I am just sorry I didn't get a better picture. I love how she has placed two butterflies together on the small tin, its something I never would have thought of doing and it looks so great.

I hope you've enjoyed me sharing my first workshop with you today. I had such a great time and it was a pleasure seeing how well Abi, Aimee, Kelly and Laura did in completing these complex projects and making it their own.
Come back on Friday to see the thank you cards, thank you gift bags and tool kits in more detail!
Remember, if you would like to receive the tutorial on how to make the card in a box, please sign up to my newsletter. You can sign up in the side bar on the right hand side under "subscribe for exclusive content". If you receive my blog updates by email you will still need to sign up as I can't automatically add you without your permission.

Timeless Elegance version
Built for Free Using: My Stampin Blog
Birthday Bouquet version
Built for Free Using: My Stampin Blog

Timeless Elegance Series - Simple Pillow Box Gift Boxes & Series Photo Collage
Wednesday, September 23, 2015

In the last 2 weeks I've showcased 7 different projects featuring the beautiful Timeless Elegance Designer Series Paper - the series has included a Stationery Tin, Thank You Card, Gift Bags, Wedding Card, Bag in a Box, Congratulations Card and to complete the series today we have a set of Pillow Boxes.


In the Autumn Winter catalogue there is a brand new die called the Square Pillow Box Thinlits Dies. You just run it through your big shot with some designer series paper and using your scoring tool and some adhesive, you have a gift box that's perfect to hold some chocolates, jewellery or even a gift card.

I've kept the design quite simple and stamped a tag using the Merry Everything stamp set onto Very Vanilla cardstock in Basic Black Archival Ink. I have used the coordinating Note Tag punch to punch it out and added it to the Pillow Box with some Stampin' Dimensionals.
You can buy the Merry Everything stamp set and Note Tag Punch in a bundle where you save 15%. For £26.25 plus P&P you get 5 stamps that can be used for Birthdays, Christmas & Halloween. This set is useful to make tags in super quick time, perfect when making multiple tags for Christmas presents.
To finish off the design, continuing with the simple theme, I added a small star / small heart punched out of Gold Glimmer paper using the Itty Bitty Accents punches. I think its just what it needed without being too fussy.

I really hope you've enjoyed my series featuring the gorgeous Timeless Elegance Designer Series Paper. This paper is so elegant and it can be dressed up or down to suit your project.
You can order a pack of the Timeless Elegance Designer Series Paper from my online shop today for just £10.00 plus P&P. Just click on the picture below in the supplies list.
You can order a pack of the Timeless Elegance Designer Series Paper from my online shop today for just £10.00 plus P&P. Just click on the picture below in the supplies list.

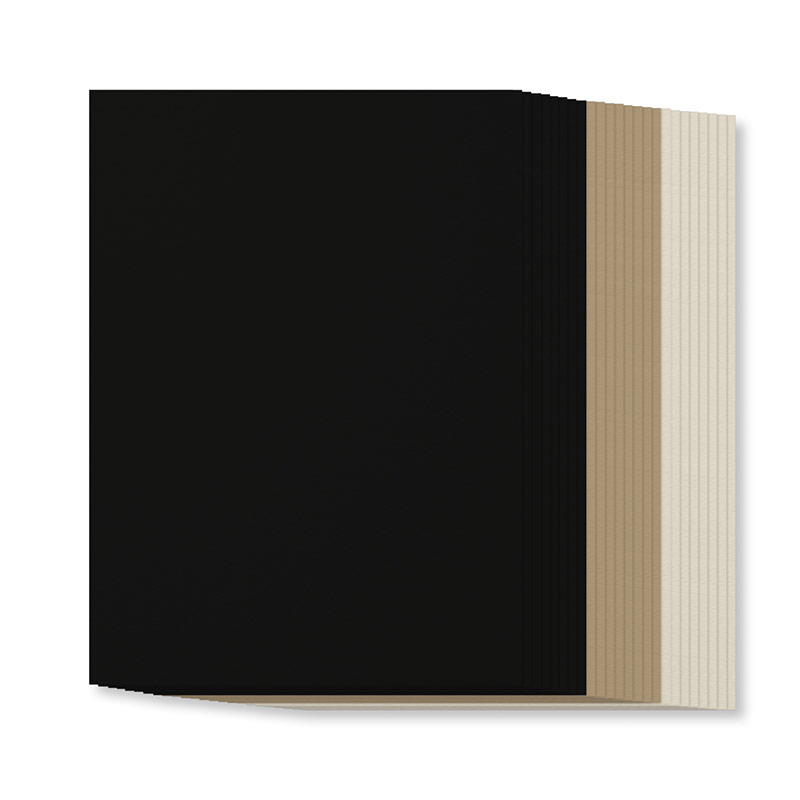
There is also a handy pack of coordinating cardstock which contains 24 sheets - 8 A4 sheets of Basic Black, 8 A4 sheets of Sahara Sand and 8 A4 sheets of Very Vanilla. It only costs £6.50!
If you would like to add this to your order, simply search Timeless Elegance A4 Cardstock Assortment Pack (code 139019) in my online shop.
If you would like to place an order, please visit my online shop or get in touch with me by email - info@handmadebykim.co.uk.
Thanks for stopping by and I hope to hear from you soon!
Subscribe to:
Posts (Atom)


Social Icons