
Showing posts with label Note Tag Punch. Show all posts
Showing posts with label Note Tag Punch. Show all posts


I have made some cute but deadly Halloween Treat Bags to show you today. I think these would be perfect to hold some sweets or chocolates for you to give to your friends and family on All Hallows' Eve.
You can make your gift bags (or boxes) whatever size you want (as long as you don't need your paper to be bigger than 12" x 12"). I've used the fantastic Happy Haunting DSP again which I've already showcased twice in two different projects - my Halloween Party Invitations and another version of a Treat Bag.
I have stamped the deadly poison bottles from the Sweet Hauntings stamp set onto Basic Black cardstock using Whisper White Craft ink. I managed to do some fussy cutting to cut out the poison bottles by hand. I layered the cut out images on top of a Tangelo Twist Scallop Circle and a 2" Circle punched out of Very Vanilla Cardstock, already stamped with the Gorgeous Grunge stamp set using Tangelo Twist ink & Basic Black Archival ink.
I also stamped a gravestone (aka note tag) using the same method but punched this out with my Note Tag Punch and attached this to secure the bag with a Mini Metallic Clothespin.
That's its for now, I'll be back on Saturday with the swaps I have made for a Quarterly Training Event I am going to on Sunday arranged by my upline Michelle Last. Check out my Facebook, Instagram or Twitter pages to see a sneek peek of my project. I've made 30 in total!


Timeless Elegance Series - Simple Pillow Box Gift Boxes & Series Photo Collage
Wednesday, September 23, 2015

In the last 2 weeks I've showcased 7 different projects featuring the beautiful Timeless Elegance Designer Series Paper - the series has included a Stationery Tin, Thank You Card, Gift Bags, Wedding Card, Bag in a Box, Congratulations Card and to complete the series today we have a set of Pillow Boxes.


In the Autumn Winter catalogue there is a brand new die called the Square Pillow Box Thinlits Dies. You just run it through your big shot with some designer series paper and using your scoring tool and some adhesive, you have a gift box that's perfect to hold some chocolates, jewellery or even a gift card.

I've kept the design quite simple and stamped a tag using the Merry Everything stamp set onto Very Vanilla cardstock in Basic Black Archival Ink. I have used the coordinating Note Tag punch to punch it out and added it to the Pillow Box with some Stampin' Dimensionals.
You can buy the Merry Everything stamp set and Note Tag Punch in a bundle where you save 15%. For £26.25 plus P&P you get 5 stamps that can be used for Birthdays, Christmas & Halloween. This set is useful to make tags in super quick time, perfect when making multiple tags for Christmas presents.
To finish off the design, continuing with the simple theme, I added a small star / small heart punched out of Gold Glimmer paper using the Itty Bitty Accents punches. I think its just what it needed without being too fussy.

I really hope you've enjoyed my series featuring the gorgeous Timeless Elegance Designer Series Paper. This paper is so elegant and it can be dressed up or down to suit your project.
You can order a pack of the Timeless Elegance Designer Series Paper from my online shop today for just £10.00 plus P&P. Just click on the picture below in the supplies list.
You can order a pack of the Timeless Elegance Designer Series Paper from my online shop today for just £10.00 plus P&P. Just click on the picture below in the supplies list.

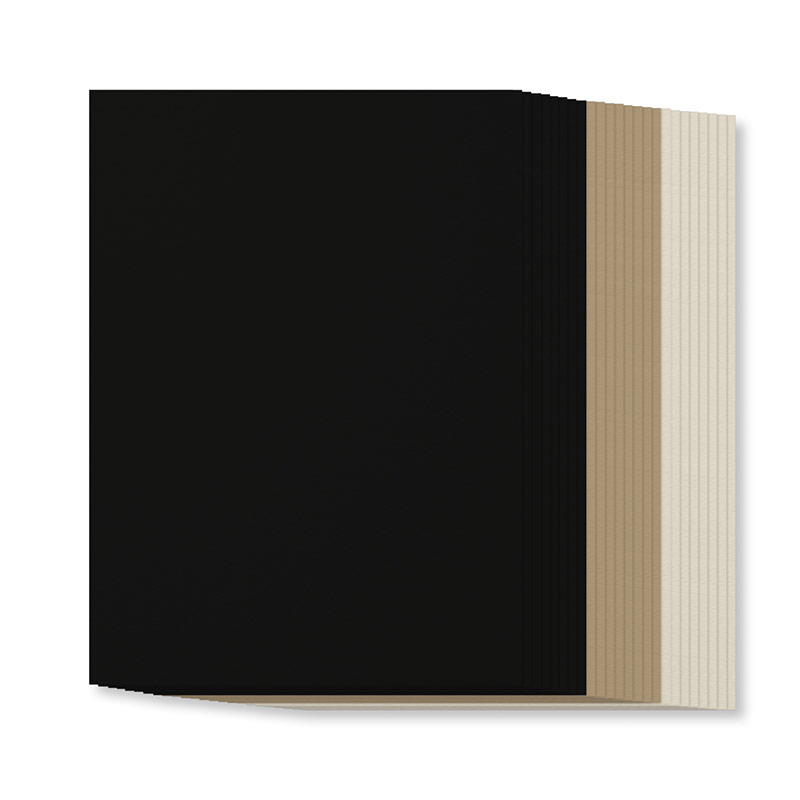
There is also a handy pack of coordinating cardstock which contains 24 sheets - 8 A4 sheets of Basic Black, 8 A4 sheets of Sahara Sand and 8 A4 sheets of Very Vanilla. It only costs £6.50!
If you would like to add this to your order, simply search Timeless Elegance A4 Cardstock Assortment Pack (code 139019) in my online shop.
If you would like to place an order, please visit my online shop or get in touch with me by email - info@handmadebykim.co.uk.
Thanks for stopping by and I hope to hear from you soon!

Pinkies Stampin' Up! 2015-16 Annual Catalogue Blog Hop! feat. A Whole Lot of Lovely Hostess Stamp Set
Saturday, May 30, 2015

Thank you for joining us on another Pinkies Blog Hop! We're showcasing lots of gorgeous projects using products from the new Stampin' Up!® Annual Catalogue. Simply use the buttons at the end of each post to keep hopping!
If you have arrived here from Catherine's blog, welcome! I really hope you enjoy looking at the projects we have made.
If you have arrived here from Catherine's blog, welcome! I really hope you enjoy looking at the projects we have made.
It's my birthday today and I am really exited to be taking part in the fabulous Pinkies Blog Hop.

Have you seen the new 2015-17 In Colours yet? One of my favourite colours is Tip Top Taupe so I decided to use this new In Colour for today's card.
I used Tip Top Taupe Cardstock and the coordinating striped paper from the new Cherry on Top Designer Series Paper Stack. This stack contains 45 double-sided sheets - 4 sheets of all 12 designs in 15.2 cm x 15.2 cm size paper. The patterns vary and feature the colours Bermuda Bay, Crushed Curry, Cucumber Crush, Hello Honey, Pool Party, Tip Top Taupe, Watermelon Wonder and Whisper White.

I stamped the sentiment You're Fabulous using the new Hostess Stamp Set A Whole Lot of Lovely and punched it out using the Note Tag Punch.
To complete the design, I wrapped some linen thread around the top of the card and added my sentiment to it and secured it in place using Stampin' Dimensionals.
I would love to know what you think of this card and as its my birthday, it would make my day if you could leave a comment.

Its only a few days now until the new catalogue is released. Click here to subscribe to my blog so you can be one of the first to download a free copy of the catalogue on Tuesday 2nd June.
The next blog is Lisa's and she has created an amazing project for you.
Happy blog hopping and I hope to see you next time!


If you have ever been a Stampin' Up! Demonstrator or perhaps part of a large craft group, you will have heard of cards swaps. It's something us Stampin' Up! Demonstrators like to do when we get together to learn new techniques or get new inspiration from each others work.
I wanted to show you my latest card swap today - a card front in Perfect Plum.

Swaps are where you make approximately 50 card fronts or tiny gift boxes and swap them with other Stampin' Up! Demonstrators for an alternative craft project. Not only do you get to mingle and talk crafts with other people, you also end up with 50 beautiful handmade items to take home!
I absolutely love swaps! I have a box full of about 100 from 3 different events and I have a good look through these when I am having a creative block.
A few weeks ago I spent the day with fellow Stampin' Up! Demonstrators. After swapping and mingling we spent the rest of the day crafting, eating lovely cake and having a good natter.
Days like this are one of the best things about being a Stampin' Up! Demonstrator, you suddenly start meeting lots of people who all love crafting and who are more than willing to help and support each other.
We made this wonderful flip book and basket that Michelle Last designed and I hope to show you these very soon!

You can make a card like this by using the Kinda Eclectic Stamp Set, the new Note Tag Punch from the Spring/Summer Catalogue and the You Made My Day Stamp Set from Sale-a-Bration.
I have listed below the supplies needed to make this card, in fact, if you buy all of the items you would earn the You Made My Day stamp set for free!

I have listed below the supplies needed to make this card, in fact, if you buy all of the items you would earn the You Made My Day stamp set for free!

Pinkies Stampin' Up! 2015 Spring Summer Catalogue Blog Hop! feat. Mini Treat Bag Thinlit Dies
Saturday, January 17, 2015

Thank you for joining us on another Pinkies Blog Hop! We're showcasing lots of gorgeous projects using products from the new Stampin' Up!® Spring/Summer Catalogue. Simply use the buttons at the end of each post to keep hopping!
If you have arrived here from Sarah's blog, thanks for stopping by! I really hope you enjoy looking at the projects we have made!
Have you had a chance to browse through the Spring/Summer Catalogue 2015 yet? There are so many fabulous products. I now have a supply of catalogues, so please do let me know if you would like me to post a copy to you.
My project today features 3 versions of the NEW Mini Treat Bag using the Thinlits™ Dies. This product is so versatile, I can think of so many uses for this!

This is my Wedding Favour Mini Treat Bag. I love the subtle colours in the Something Borrowed Designer Series Paper and thought I would keep the overall design quite clean and simple.

Here is my Retro Party Mini Treat Bag using the Painted Blooms Designer Series Paper. This would be perfect for an 80's party (or even a kids party). This version really utilises all of the dies included with the Mini Treat Bag Thinlits™ Dies. Whilst this is not my natural style, I loved putting these bold colours together, it was so much fun!

My final version is my Garden Party Mini Treat Bag. I have used the Painted Blooms Designer Series Paper again. I added a lovely bow made using the Bow Builder Punch to finish this off perfectly.

If you would like to order the Mini Treat Bag Thinlits™ Dies and a pack of Designer Series Paper for your project, please click on the pictures listed under supplies used to take you to my online shop or contact me through the Social Media Icons at the top and bottom of the page. Ordering these two items means you will qualify for FREE Sale-a-Bration products!
I can't wait to see what projects you have made, please post pictures on my facebook page or post a link to your blog under comments.
I would also love it if you would subscribe to my blog, so you can keep up to date with my latest creations!
Next we have Em's blog! Press next to continue hopping to see all of the fabulous Pinkies creations using products from the Spring/Summer catalogue.


Retro Party Mini Treat Bag supplies used


Garden Party Mini Treat Bag supplies used


Subscribe to:
Posts (Atom)


Social Icons